Showing posts with label Decor. Show all posts

Tuesday, September 29, 2015

Fall is not in the air...

Halloween Decor

Our record high, triple-digit weather is officially unwanted. We've got to make it look like fall since it doesn't feel like fall!

Its not even October and we have all the Halloween decor up which is uncommon even for a Halloween lover like myself. Hallie and I had to miss out on a girls night out this weekend with her cousins. (Steve and Hunter were at the game which left me with two little boys, who were not wanted at girls night out!) In an effort to create a worthwhile consolation prize, I offered to pull out all the Halloween decor. She was beyond excited. She pulled everything out of the bins and put them in the areas of the house where they belonged. It's a process.

After everything was laid out I realized we were missing several things. I went back to the garage in search of them. Having color-coded holiday bins is genius - but not so genius when you run out of space at the end of the season and the stores no longer have orange plastic totes...as was the case last year. Which meant we had a box of Halloween decor in a green bin with a purple lid which I eventually located in the disaster we call a garage. Crisis adverted. I made a note to buy an orange bin ASAP.

The decorations are up - pumpkin scented oil is warming - candy has been purchased - all that's left to do is fill the advent calendar and let the kids fight over whose turn it is to get the candy! Let the fall games begin.
 photo 20150930-DSC_1502.jpg

Thursday, September 24, 2015

Heritage gallery wall...

Most of my projects require me at some point to sit at the computer and make my plan. I use Illustrator to draw things to scale so I get a good idea of what the end product will look like. This comes in handy when I'm hanging anything on my walls. I'm not sure why, but hanging stuff is paralyzing for me. As if once it is hung it can never be removed. I'll have things stacked against the wall for months before having the courage to hang them. And I only hang them after I've measured the wall and drawn everything out. It's a process.

Even after drawing it out on the computer, I often take one more step: Trace all my elements on paper and cut them out and hang them.

You can see on my "heritage wall" below I have my computer version (white paper) taped to the stairs and then all my cutouts in their place. (as you can see this picture was taken before we made some major updates) I even marked where the hook (to hang the frame) was located on the paper so I could nail straight through the paper and get the right placement each time - without multiple wounds to my wall.
Heritage Wall - creating a gallery wall

This is a process where a little upfront effort goes a long way!
Heritage Wall - creating a gallery wall
It was an awkward space before - on a small wall - and now it houses some of my very favorite pictures of our ancestors. It's our heritage wall and it's always a conversation starter for people visiting our home. It's good to know where you come from.

Thursday, September 3, 2015

DIY USA Wall art...

Here's a project that I completed back in April and I'm just now getting around to posting it. Its funny - I'll do a project, work hard to complete it and display it and then the newness wears off and I forget that I haven't posted any pictures.
DIY USA wall art made from cheap fencing or pallet wood
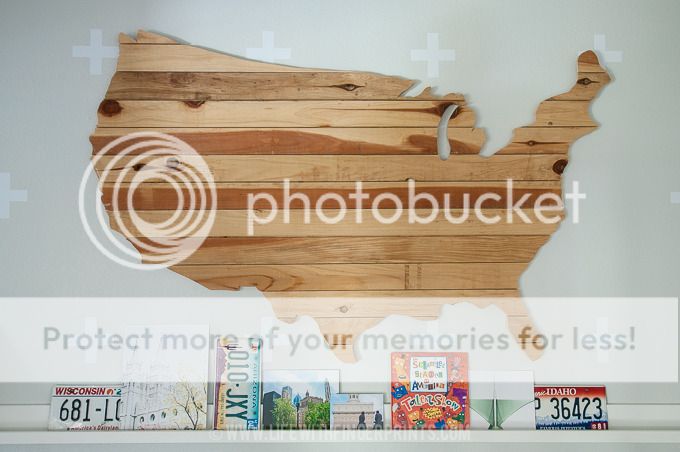
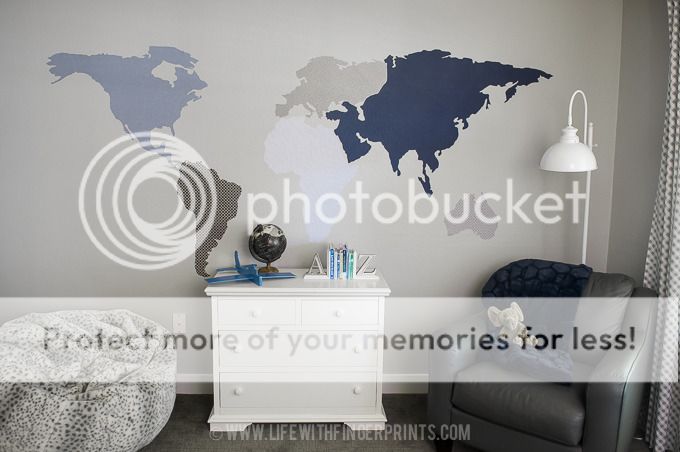
I may have an obsession with maps and globes. It’s my hope that it creates curiosity and a sense of exploration with my children. This wooden DIY USA wall art is my new favorite wall decor and it was easy. I’m not just saying that…really. In fact, I had a friend do this project with me. A friend who had never picked up a jig saw before and she will agree, this is much more manageable than it looks.

You’ll need:
A sheet of plywood
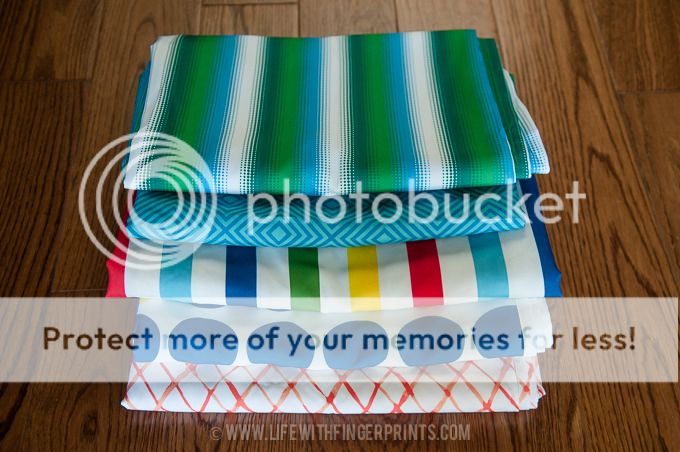
Planks of wood; pallet wood or inexpensive fencing
Wood Glue
Nails
Projector of some type
Jig saw

Start by cutting a sheet of plywood roughly to the size of your desired map size. Home improvement stores will gladly cut this to size for you. Mine is almost 6 feet wide.

Lay out how your planks are going to sit on your plywood. I chose inexpensive cedar fencing with a horizontal pattern. Glue the planks to your plywood. I used heavy buckets of wheat to keep it flat while drying. You could just as easily throw some nails in the back to keep it in place as it dries.
DIY USA wall art made from cheap fencing or pallet wood

Once it’s completely dry, trace a backwards map on the plywood side using a sharpie marker. I used an LCD video projector, but an overhead projector would work with a transparency.
DIY USA wall art made from cheap fencing or pallet wood

Once the map was traced, I reinforced the entire perimeter of the map (on the inside of my tracing) with nails from my nail gun. I knew that the jig saw would be reciprocating and may cause some of the smaller pieces to come unglued – this helped keep everything together.
DIY USA wall art made from cheap fencing or pallet wood

With the plywood side up, using a jig saw, slowly cut along the marker line outlining the map. There are a lot of intricate pieces in the USA and I didn’t cut every little piece, a jig saw isn’t meant for fine cutting. Some cuts you’ll need to come at it from several angles in order for it to work, but be patient.
DIY USA wall art made from cheap fencing or pallet wood

At first you’ll want to try and follow every little curve and line, only to realize you really don’t need to. Depending on your size of map, the cutting out may take an hour or two. Go slowly. Take breaks – or else your hand may fall off from the vibration of the saw!

Flip it over and admire your work. You may see areas you want to clean up just a bit – or be more intricate on and if thats that case, flip it over and keep cutting.

I decided to keep this piece a little rustic. I sanded just a few of the edges to make them nice but I didn’t sand the entire piece. I liked the rough wood – it had character and charm. I also chose not to stain it, because I liked the variations of color in the wood. But you can choose what fits your house and style – sand and stain if desired!
DIY USA wall art made from cheap fencing or pallet wood

I originally posted this at HowDoesShe.com

Friday, August 21, 2015

DIY Marker Board...

Life with Fingerprints: DIY Marker board using a frame and wrapping paper
I've got more than a couple of these marker boards around the house and I love them. I have them in the hallway, the kitchen, the office. They're easy and cheap and they bring in whatever pop of color or pattern I'm looking for.

Start with a frame - I like the simplicity and affordability of the Ikea frames.
Life with Fingerprints: DIY Marker board using a frame and wrapping paper

Remove the mat from the frame and cover it with paper. I find that wrapping paper works great. I've had great luck with TJ Maxx and Home Goods wrapping paper - great colors and modern patterns.
Life with Fingerprints: DIY Marker board using a frame and wrapping paper

Tape the paper in place around the mat and replace the mat in the frame.
Life with Fingerprints: DIY Marker board using a frame and wrapping paper
Hang them on the wall, lean them on a shelf, stand them on a counter - you've got a marker board. Regular dry erase markers write on the glass and wipe off without any problem.

We use the ones in the hallway to hold quotes, reminders and lists.
Life with Fingerprints: DIY Marker board using a frame and wrapping paper
The one in the kitchen was used to write love messages between family members.
Life with Fingerprints: DIY Marker board using a frame and wrapping paper
The ones in my office I don't usually write on - I just like the color they bring to the room, but occasionally I'll write a quote on them.
Life with Fingerprints: DIY Marker board using a frame and wrapping paper

When you want to switch things up - find a new wrapping paper and the look is updated in no time.

Thursday, July 2, 2015

Coffee Filter Garland tips and tricks...

My friend made a beautiful coffee filter garland for her daughter's birthday party. I loved everything about it and when I decided to throw a baby shower for my niece I gave it a shot. It was just as cheap and easy as I was hoping for.
Life with Fingerprints: Coffee Filter Garland tips and tricks, Grand Adventure Baby Shower
You can find hundreds of instructions searching pinterest - they're all pretty much the same. Here's just a few tricks I learned in the process.

First off - I used 1000 filters (although not all of them ended up being strung, I ran out of time!) I used the larger filters that are for 12-16 cup coffee makers.

Many instructions tell you to put color water in spray bottles and spray the filters. This would've taken forever to dye 1000 filters. After dying 25 filters with a water bottle I became more efficient.
Life with Fingerprints: Coffee Filter Garland tips and tricks, Grand Adventure Baby Shower
I mixed water and dye in a medium sized bowl. I then separated the filters out into groups of 50 (my filters came divided at 50 filters). I took the entire stack and dipped them in the bowl.
Each bowl of water covered 100 filters and then I would mix another bowl of water and dye. Each bowl had different ratios which gave a great color variance.

Some stacks I would dip just one side and let the color bleed to the other. Some stacks I only dipped the outside edges. Others stacks I saturated the whole stack.
Life with Fingerprints: Coffee Filter Garland tips and tricks, Grand Adventure Baby Shower
I then separated that stack into smaller stacks and layed them across my backyard to dry.

Life with Fingerprints: Coffee Filter Garland tips and tricks, Grand Adventure Baby Shower
They took a warm Arizona afternoon to dry and once they were dry I threw them in a large garbage sack.
Life with Fingerprints: Coffee Filter Garland tips and tricks, Grand Adventure Baby Shower

Then it was time to string them. 1000 filters could make one 8 foot garland with really dense filters. I needed more than 8 feet so I spaced my filters using clear drinking straws cut into 1/2" sections.

Using fishing line and a sewing needle I strung 2 filters and then a 1/2" straw section, 2 filters, straw section...repeat.

The finished product was several 6 foot garlands that I hung from the ceiling using command strips.

They were the main focal point of the shower. The wow-factor. And they were so darling I couldn't bring myself to get rid of them. So...they're now sitting in my attic just waiting for someone else to have a baby boy so I can throw a party!

Thursday, June 18, 2015

Easy Pennant Banner...

Here's my latest post at HowDoesShe.com - it's not too late to make some 4th of July decorations!
Easy Pennant Banner made with oilcloth fabric and bias tape
One of the easiest decorations that is in my holiday arsenal is the pennant banner. I use them for holidays, birthday parties, wedding and baby showers and more – I’ve got a lot sitting in my closet. And I think I’ve used just about every material to make them: Wood, paper and fabric. Wood is heavy and hard to hang. Paper is the easiest – but buying cute scrapbooking paper isn’t always cheap. Fabric is my favorite because of the durability – but its also the most time consuming because you have to finish edges (unless you’re going with burlap and frayed edges is expected.)

But here’s my secret weapon- use oilcloth fabric and you don’t have to finish the edges and they don’t fray. You get the best of both worlds. Here’s a decoration you can hammer out in 20 mins.

Buy some festive oilcloth – think washable tablecloth material. I’ve seen some fabric stores with great selection but it’s hit or miss. I usually buy oil-cloth online – even then selection is not near what it is for fabric.

Easy Pennant Banner made with oilcloth fabric and bias tape
Easy Pennant Banner Tutorial
Cut strips of fabric (mine were 6″) and then cut out the shapes of your choice. Triangles are always a safe route. Squares are fun. Sometimes I mix it up like I did for this patriotic banner and mix shapes.
Easy Pennant Banner made with oilcloth fabric and bias tape
The next secret weapon to make this project a breeze: extra wide double fold bias tape. It’s double fold which means all the edges are finished.
Easy Pennant Banner made with oilcloth fabric and bias tape
I like to lay the tape out and line them all up so I can adjust what needs to be adjusted. Then slip your fabric in the tape and sew from one edge of the tape to the other. I’ve done enough of these that I usually pin the first flag and eyeball the rest.
Easy Pennant Banner made with oilcloth fabric and bias tape
You’re done. I wasn’t kidding about this being a 20 min project. 15 minutes of cutting. 5 minutes of sewing. It took me longer to get a step stool and hang it than it did to make it.
Easy Pennant Banner made with oilcloth fabric and bias tape
Easy Pennant Banner TutorialI had some scraps and made a miniature pennant for our chalkboard. I didn’t have extra bias tape so I ran the sewing machine from one piece of fabric to the other with a half inch gap and it worked great.
Easy Pennant Banner made with oilcloth fabric and bias tape
Happy decorating!

Thursday, June 11, 2015

Cannon's Nursery...

I shared a wall treatment I created with a large world map. That wall is in our nursery - the bedroom I spend the most time in next to my own.

I had the idea for the world map and created it long before other elements started to take shape. I thought I would be able to get the whole thing put together before our baby arrived. I was wrong. In fact, after Cannon arrived I didn't touch the room for months, such is the life of a new mom.

But piece by piece it came together and it might be the only room I consider "done" in the house. And it's for a baby who couldn't care less. But like I said, I spend a lot of time in their and I quite enjoy it.

Life with Fingerprints: Blue and Gray Baby Boy Nursery with a Global Theme
My mother-in-law made the quilt just as she has for each of our children. It uses some of the same fabrics that were ironed to the wall.
Life with Fingerprints: Blue and Gray Baby Boy Nursery with a Global Theme
This bookshelf was my very first wood project just 5 years ago. It was the project that gave me confidence and made me fall in love with the process. It's been in Hunter's room, Bennett's room and now resides with Cannon. It's still one of my favorite creations.
Life with Fingerprints: Blue and Gray Baby Boy Nursery with a Global Theme

Source List: (many of these items we've had since Hallie was a baby - when I worked at Pottery Barn Kids and received an unreal discount.)
Paint Color: Benjamin Moore Cumulus Cloud
Crib: Pottery Barn Kids
Chair: La-z-boy Outlet
Dresser: DownEast Home
Curtains: Made with fabric from TonicLiving.com
Rug: Rugs USA
Lamp: TJ Maxx
A-Z Bookends: Pottery Barn Kids
Plane: Pottery Barn Kids (the same plane that hung in Hunter's nursery in his vintage planes room - now with a new coat of paint!)
Wire Globe and orbs: Pottery Barn Kids/West Elm
Snow Leopard Bean Bag: DownEast Home
Navy Honeycomb blanket: TJ Maxx

Wednesday, June 10, 2015

Party decor staple from Target...

I avoid Target at all costs. Not because I don't love it - because I do - I just can't seem to walk out without additional items I forgot that I "needed"!

One thing I'm a sucker for at Target is tablecloths. Not your everyday tablecloths - but their outdoor line. They usually show up toward the end of April and it's hard to find once their back-to-school stuff hits the shelves. They're nestled in the back of the store in between the bocce ball set and the picnic ware. There's usually a couple designs to choose from and they're made of polyester - easy to clean and even easier to throw in the dryer to get wrinkles out.
Life with Fingerprints: Party decor staple from Target - the outdoor tablecloth
Every year, I treat myself to their new line and buy two tablecloths with the same print; I've done this for several years and I've accumulated quite the collection. (we often entertain with two long tables which is why I buy 2 of each print) And before you think I'm crazy - I use them all the time. In fact, on the last day of school I was gearing up for the party we were hosting and I went to my beautiful linens closet and pulled out two tablecloths and thought to myself, I love all of them.

Each one has been used and loved. Every birthday party I throw I walk to the closet and look through to see which tablecloth I can decorate around. Often times I'm layering tablecloth on tablecloth, not to mention the solid red ones I have are used the most. I'm convinced red is the universal party color!

Have I mentioned that we host a lot of gatherings and parties?? Here's just a few examples of how I've used them:

Halloween Carnival party
Life with Fingerprints: Party decor staple from Target - the outdoor tablecloth
Circus party
Life with Fingerprints: Party decor staple from Target - the outdoor tablecloth
Superhero party
Life with Fingerprints: Party decor staple from Target - the outdoor tablecloth
Bubbles
Life with Fingerprints: Party decor staple from Target - the outdoor tablecloth
Cinco De Mayo
Life with Fingerprints: Party decor staple from Target - the outdoor tablecloth

Because they're polyester they look just like they did the day I bought them. They're perfect for fun parties - however, you can probably give them a miss for your fancy holiday dinners!

I tell you all of this because they're currently in stores and I just picked up this years print. In the past I've stayed pretty consistent with basic geometric shapes and this year it is not quite as universal, but I really loved them. It just means I need to start throwing Memorial day and 4th of July parties.
Life with Fingerprints: Party decor staple from Target - the outdoor tablecloth
Everything is branded "Peanuts" this year for their outdoor line - but I assure you there are no characters on the actual fabric.

There's another print that I have my eye on, and only if it's around when they start marking everything half off will it end up in my closet. Fingers crossed.
Related Posts Plugin for WordPress, Blogger...