Showing posts with label Organize. Show all posts

Tuesday, April 12, 2016

Keepsake box...

Hunter reminded me that he only has 6 weeks left of school. 6 weeks. I'm panicking just a little bit at the thought of 5 kids home all summer long...but that's another story.

With the end of the school year upon us, my kids are starting to come home with more projects and papers than ever before. It's always tough deciding what to keep and what to toss. But it makes it a lot easier when your kids don't care and they're not fishing papers out of the trash can.

Here's the system we use to manage all the school paper clutter (or memories...whatever you prefer to call it!)

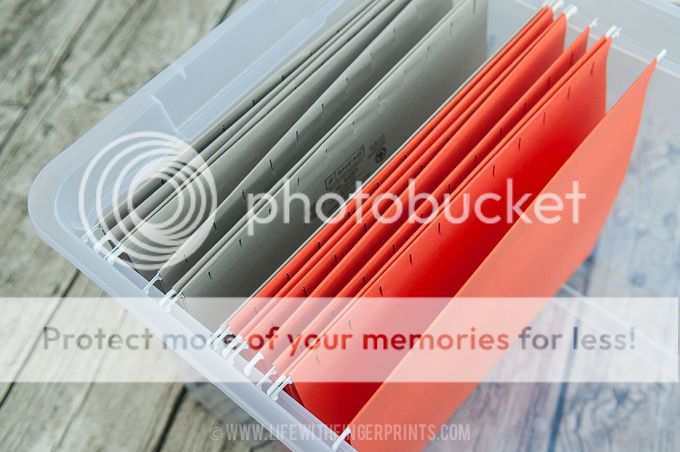
I have one large filing box and different colored hanging folders for each kid. (I found the boxes at Staples and Amazon has just about every color of folder you could imagine.)

I designed the labels and they can be downloaded at HowDoesShe.com.
Keepsake box for kids papers and school work
I printed the labels out on cardstock paper. The name plate will download blank – you can print it out and write on it or use your fancy photoshop skills and photoshop the name onto the document. Tape the nameplate on the inside of the box for easy recognition.
Keepsake box for kids papers and school work
Next, cut out the tab labels. I used the cardstock label tags that came with my folders and I placed my label on top of it. Arrange the tabs so they’re staggered, making each tab readable.
Keepsake box for kids papers and school work
On the front of each folder, glue or tape the “year in review” label. This is a quick snapshot of your child for that particular school year. You could also attach a school picture next to it if you’re feeling really ambitious.
Keepsake box for kids papers and school work
My keepsake boxes are stacked in a closet. I only access them a couple times a year. I keep a small box without a lid that I throw papers in throughout the school year. Periodically, I’ll sit down and rummage through the box and put the papers in the appropriate boxes and folder. This is a task that your child can easily complete for themselves. I’ve known people to do this once a year at the end of the school year.

Find what works best for you and just stick with it!
Keepsake box for kids papers and school work

Thursday, September 17, 2015

Ikea Art Cart...

Our playroom was once littered with art supplies. I love that my kids like to create but finding broken crayons and glue without tops was driving me crazy. Every couple days, I would have the kids round up all the supplies and put them back in their place in the playroom. Just hours after cleaning, I would walk in and find art supplies everywhere. I realized it wasn't really the older kids who were creating the mess - its the monster one year old we have running around that seems to make messes wherever goes. The only way to solve the problem was to remove the art supplies but make them very accessible.

Introducing the Ikea art cart that resides in my office closet.
Ikea Art Cart for craft supplies

I purchased a cart on wheels from Ikea. This allows the cart to be mobile and can travel to and from the playroom when needed.

Also from Ikea I purchased two sets of white magazine holders. These hold the coloring books, workbooks and clipboards. The clipboards were purchased for another project that I never completed and the kids kept sneaking them to color on. They are a staple on the art cart.
Ikea Art Cart for craft supplies

The bottom two layers are filled with quart-sized canning jars. Hallie meticulously sorted out all the supplies and organized them into different jars. Crayons, colored pencils, twistable pencils, twistable crayons, pencils and pens, scissors, markers, glue sticks, glue, whiteboard markers...and more. Everything they need for a art project or school assignment. Sometimes, they don't need the whole cart and they leave it in the closet and take the jars they need. Hallie will take a jar to her room to color and return it later.
Ikea Art Cart for craft supplies
It's been over 6 months and the supplies have remained relatively organized. There have been a few casualties including when the cart was left in the playroom by accident and a certain toddler dumped out the jars. But the kids have been great about making sure it gets put away since then.
Ikea Art Cart for craft supplies
The best part is anytime they're looking for a supply - they know exactly where to look. It's also easy to see what we're running low on - which doesn't happen to be gluesticks, we've got two jars full!

Thursday, January 29, 2015

DIY Construction Paper Organizer...

I'm a sucker for just about anything at Costco. 5lb bag of chips. Of course. 30 pairs of socks...you can never have too many. And who can't use a sharpie in every color of the rainbow? Like I said, I'm a sucker. At the beginning of the school year I was perusing the isles when I came across the largest pack of construction paper I had ever seen. My kids love crafts and we go through card stock like there's no tomorrow so this was right up our alley.

Immediately after my purchase I had buyers remorse. We didn't really need that much paper and I came to the realization that it was going to be scattered through the house. It sat on my laundry room counter for months while I went back and forth. Ultimately, Hunter had a school project that required several sheets of paper and we busted the package open and he chose his colors. I was trying to keep it neat and tidy, so it stayed on the counter. Then Hallie needed some paper and pulled out a few and before long the nice tidy stack found its way to the game/crafts closet. It didn't take long for my nice stack to turn on it's side and start to create chaos. See it there:
Life with Fingerprints: DIY Construction Paper Organizer
And no matter how many times I straightened it I couldn't get it to stay clean. In my annual beginning of the year purging and cleaning of the house I resolved to find a solution. I bought several bins and boxes and nothing worked like I needed it to. So I turned to the garage and my never ending piles of scrap wood and pulled out the table saw.

I cut two sides and a back piece of wood and cut 9 sets of grooves in each (using the table saw) and cut a top and bottom
Life with Fingerprints: DIY Construction Paper Organizer
I glued, clamped and nailed the sides to the back and attached the tops and bottoms as well.
Life with Fingerprints: DIY Construction Paper Organizer
Once dry, I was able to slide in each shelf - which is adjustable, shelves can be removed for larger stacks of paper.
Life with Fingerprints: DIY Construction Paper Organizer
I returned the stack of beautifully organized paper back to the closet. Yes, it looks like it belongs in a 1st grade classroom. But what home couldn't benefit from a little paper organization? It makes me happy. It makes me even happier to know that my kids have pulled out papers every day and it still looks like this!
Life with Fingerprints: DIY Construction Paper Organizer
The best part is I didn't even paint or stain it. I like the natural wood and it wasn't worth pulling a paintbrush out!
Life with Fingerprints: DIY Construction Paper Organizer
Related Posts Plugin for WordPress, Blogger...