Showing posts with label Recipes. Show all posts

Sunday, July 17, 2016

Sugar Cookie Cake...

My sister-in-law made this for us last week and I was reminded again just how much I love this cake!

When the Pothiers get together for a birthday or holiday celebration it is a big crowd. Typically the easiest way to treat so many people to dessert is to make a sheet cake. Depending on the RSVPs it may be one or possibly two sheet cakes. Most everyone is familiar with the traditional chocolate "Texas Sheet Cake", and it's a family staple. But last year my SIL Laurel decided to mix things up and bring a "Montana Sheet Cake" to a gathering. It has since been lovingly renamed sugar cookie cake (thanks to the almond extract) by our family and it is delicious. Two weeks ago I decided to make one while visiting my family in Idaho and just 5 days after it was devoured, my SIL had purchased the ingredients for me to make it again. It's addicting if you like sugar cookies.

Here is the recipe from Laurel, from her friend, from her niece, from her monkey's uncle. I love how recipes float around!
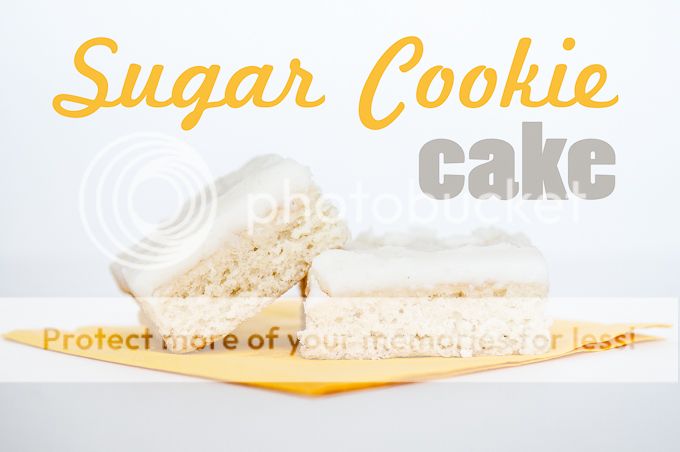
Life with Fingerprints: Sugar Cookie Cake SUGAR COOKIE CAKE
2 1/4 cups flour
2 cups sugar
1 tsp salt
2 cubes butter
1 cup water
2 eggs
1 tsp baking soda
1 tsp almond extract
1/2 cup sour cream

Mix flour, sugar, and salt in a bowl. Heat butter and water in a saucepan until butter melts and pour over dry ingredients. Mix until smooth. Add eggs, soda, extract and sour cream, mixing after each addition. Bake in a half sheet pan (18x13) at 350 for 20 minutes.

FROSTING
2 cubes of butter
1/4 cup milk
1/2 tsp almond extract
5-6 cups powdered sugar
Heat all ingredients except sugar until butter melts. Remove from heat and add sugar gradually. Let cake cool before topping with frosting.

I make the frosting really thick. I like it to resemble sugar cookie frosting but you can alter it to your preference.

Thursday, July 7, 2016

Homemade Bread...

Steve is a thoughtful son. A while back, Steve's parents came back from Ghana for a family wedding. It was a short visit, only a week long, and we all knew they would be stretched thin to do and see all that they could in their short time.

Steve wanted to spend time with his mom. He also knew she would be making bread to enjoy the week while they were home. So he arranged to have her teach him how to make bread. An added bonus was bringing Hallie along and letting her enjoy the experience as well. She was all in.

They spent the afternoon together. Talking and catching up and learning. Steve enjoyed his time. Hallie couldn't wait to show me how her loaves turned out. And I'm pretty sure his mom enjoyed passing on years of experience in bread making to her son and granddaughter. And we all benefited with some delicious bread!

Homemade whole wheat bread

Monday, May 23, 2016

Easy Chicken Tikka Masala...

My sister-in-law made us a delicious Sunday dinner of Chicken Tikka Masala after Briggs was born. I know it's one of their family favorites and it was delicious - we made it again not too long after and it was just as delicious and relatively easy. It's a tad spicy - I thought it came from the jalapeño in the sauce but even the grilled chicken was spicy. The marinade ingredients seemed completely random but they work - I could eat the grilled chicken on it's own.
Easy Chicken Tikka Masala

Marinade:
1 cup plain yogurt
1 tablespoon lemon juice
2 teaspoons ground cumin
1 teaspoon ground cinnamon
2 teaspoons cayenne pepper
2 teaspoons black pepper
2 teaspoons ground ginger
1 teaspoon salt
3 boneless skinless chicken breasts

Combine all marinade ingredients, and coat chicken and refrigerate for at least an hour.
Easy Chicken Tikka Masala

Grill or cook the chicken and discard marinade.

1 tablespoon butter
1 clove garlic, minced
1 jalapeno pepper finely chopped
2 teaspoons ground cumin
2 teaspoons paprika
1/2 teaspoon salt
1 8-oz can tomato sauce
1 cup heavy cream
1/4 cup chopped cilantro

Melt butter in a large skillet over medium heat. Salute garlic and jalapeño for one minute. Season with cumin, paprika and salt. Stir in tomato sauce and cream. Simmer on low until sauce thickens (about 20 minutes). Add grilled chicken and simmer for 10 more minutes. Garnish with fresh cilantro and a little plain yogurt or sour cream. Serve over hot rice.

Tuesday, January 26, 2016

Bacon wrapped chicken skewers...

Every winter, Steve and I both agree it's the perfect weather for grilling and we try to cook out more often. One of our family's very favorite grill item is bacon wrapped chicken skewers. They're simple enough that they don't require a recipe - but fair warning, it can be time consuming to get everything chopped up and on sticks.

The staples are fresh pineapple, bacon, chicken, pepper and onion. I personally like tomatoes on them as well, but they don't always make the cut.
Bacon wrapped chicken skewers
Cut everything into bite-size pieces; this includes cutting a package of bacon in half. (We make these often enough that I purchased metal skewers from Amazon which I prefer over the wooden skewers.) Skewer the pieces in whatever order you like - wrapping the chicken with a piece of bacon before adding to the skewer. Sometimes I'm a nice mom and I make separate skewers based on what the kids like and other times I make all of them exactly the same.
Bacon wrapped chicken skewers

I used to make a teriyaki sauce to marinate the skewers in, but then I found a sauce I liked better and I haven't turned back.
Bacon wrapped chicken skewers

Bacon wrapped chicken skewers
Refrigerate for an hour or two, or even longer if you have time and then cook them on the grill. Serve with rice and teriyaki sauce.

If you want to get really fancy - ourbestbites.com has a recipe for lime cilantro rice with pineapple that compliments this palate quite nicely.

Thursday, December 3, 2015

Peppermint Oreo Dessert...

One of our family's favorite treat is "Frozen Oreo Delight" (That may or may not be a family assigned name to the dessert!). But the minute peppermint ice cream hits the grocery freezer our family’s favorite dessert gets a holiday makeover. This takes just a few minutes to throw together and it will have everyone begging for more!

Here’s what you need:
Life with Fingerprints: Peppermint Oreo Dessert with peppermint Joe-Joes
Candy Cane Joe Joes
Peppermint Ice Cream (Blue Bell is my absolute favorite)
1 stick of butter
Cool Whip
Candy Canes

Crush or blend a box of Candy Cane Joe-Joes in a food processor or blender. (You can substitute regular Oreos if you don’t have a Trader Joes close). Typically we make Oreo Delight in a 9×13 glass pan, but part of the holiday makeover is making it a little more fancy by creating layers in a springform pan. Divide the crushed cookies into two bowls. Melt 1/4 butter and mix with one bowl of Oreos. Press Oreos into a greased springform pan.

Life with Fingerprints: Peppermint Oreo Dessert with peppermint Joe-Joes
Put it in the freezer for about 30 minutes until firm. Soften 1/2 of the container of peppermint ice cream. You can leave it at room temperature to soften or you can be impatient like myself and pop it in the microwave for just a bit, stir, microwave, stir. Spread over the Oreo mixture and freeze until firm.
Life with Fingerprints: Peppermint Oreo Dessert with peppermint Joe-Joes
Create another Oreo layer with the second bowl of crushed Oreos and 1/4 cup of butter. Freeze. Use the second half of the peppermint ice-cream and press into the pan. Freeze for 2-3 hours.

Once your ready to serve, run a warm wash cloth along the outside of the pan and release the spring. Top with softened cool whip, drizzle with chocolate syrup and sprinkle with crushed candy canes.

Now just try and contain yourself from licking every plate as you hand them to your guests!
Life with Fingerprints: Peppermint Oreo Dessert with peppermint Joe-Joes

Friday, October 30, 2015

Quick and Easy Halloween Treat...

There's never enough time and never enough fairy dust to make everything fun and magical for the kids during the holidays. I often find myself caught between practical mom and fun mom so I'm always looking for shortcuts. I discovered this shortcut 6 years ago preparing for Hallie's 4th birthday party when I was running short on time and I needed a Halloween treat fast. (So short on time that I even bought sheet brownies from Sams club!) It's now an easy go-to when I'm looking for a festive treat and the generic mini-cupcakes stacked 10 rows high at Wal-mart just aren't cutting it.

You can find all the details in my post at HowDoesShe.com.

Quick and Easy Halloween Treat

Thursday, August 27, 2015

BBQ Tip...

Summer = BBQ. And BBQ = Hot Dogs. Its hot dog season.
BBQ Tip: Spiral cut hot dogs
And before you think – the way you cut your hot dog can’t possibly make a difference in the taste – let me tell you it totally does.

With very little effort – your hot dogs will taste better than ever before.

The supply list is pretty short: Hot dogs, skewers (metal or wooden) and a knife.

Start with your favorite brand of hot dog (mine happens to be the Kirkland All Beef hot dogs from Costco) and a skewer.
BBQ Tip: Spiral cut hot dogs
Skewer your hot dog down the middle.
BBQ Tip: Spiral cut hot dogs
Starting on one end, take a knife and cut at an angle all the way to the skewer. Rotate your hot dog until you reach the end.
BBQ Tip: Spiral cut hot dogs

Remove the hot dog from the skewer and barbecue.
BBQ Tip: Spiral cut hot dogs
The hot dogs plump up real nice and the edges of the spiral get nice and crisp. Not to mention the spiral edges give more room for your favorite condiments. Nothing beats a condiment bar with your spiral dog – we’ve even thrown a party with a hot dog bar and everyone walks away happy. Happy summer grilling!
BBQ Tip: Spiral cut hot dogs
I published this originally at I Heart Naptime.

Tuesday, July 28, 2015

Mall Pretzels...

While passing through Utah on our way to Idaho - we stopped by to see some old friends from our Milwaukee days. We gathered for a play date and my loving and ambitious friend Leslie thought ahead and made pretzel dough. So by the time we showed up to play and catch up - the kids were busy making pretzels. They may not have been the most beautiful pretzels. In fact, some weren't considered pretzels at all - there were swords, balls, braids - the pretzel dough pretty much became play dough that we cooked. And as unappetizing as some of them looked, they were all delicious. I'm a sucker for just about any bread.
Life with Fingerprings: Mall Pretzels

The kids took about 30 minutes to become reacquainted and then they were pretty much best friends that couldn't stand to say goodbye to each other. There was beauty salon and nerf gun wars and cars outside on the patio. They played for hours. We laughed about how much our families have grown since our babysitting coop days years ago. Here's a picture of our two families all grown up (another friend had already left with her four girls). We'll continue to snap a picture like this every year!
Life with Fingerprings: Mall Pretzels

And it seems as though every other year or so we're introducing soon-to-be friends.
Life with Fingerprings: Mall Pretzels


And because I really did love the pretzels, I snagged the recipe off the counter.

Mall Pretzels
1 (.25 ounce) package active dry yeast
2 tablespoons brown sugar
1 1/8 teaspoons salt
1 1/2 cups warm water (110 degrees F/45 degrees C)
3 cups all-purpose flour
1 cup bread flour

2 cups warm water (110 degrees F/45 degrees C)
2 tablespoons baking soda
2 tablespoons butter melted
2 tablespoons coarse kosher salt

In a large mixing bowl, dissolve the yeast, brown sugar and salt in 1 1/2 cups warm water. Stir in flour, and knead dough on a floured surface until smooth and elastic, about 8 minutes. Place in a greased bowl, and turn to coat the surface. Cover, and let rise for one hour.

Combine 2 cups warm water and baking soda in an 8 inch square pan. Line 6 baking sheets with parchment paper.
After dough has risen, cut into 12 pieces. Roll each piece into a 3 foot rope, pencil thin or thinner. Twist into a pretzel shape, and dip into the baking soda solution. Place onto parchment covered baking sheets, and let rise 15 to 20 minutes.
Preheat an oven to 450 degrees F (230 degrees C).

Bake in the preheated oven for 8 to 10 minutes, or until golden brown. Brush with melted butter, and sprinkle with coarse salt, garlic salt or cinnamon sugar.

Thursday, July 9, 2015

Dinner Group...

Our friend suggested we start a dinner group: An evening where we cook something new as a group and enjoy the meal together. She suggested the first meal; fresh spring rolls and sukiyaki. I had no clue what sukiyaki even was. Her brother had served a mission in Japan and had come home and taught the family how to make it - she was passing on the knowledge to us.

She sent out food assignments as to what we needed to bring. I probably called her three times asking her questions about my assignments. How big should I cut the celery? Is the special type of cabbage really needed? Do you want me to cook a whole pack of noodles or will a half pack do?

I was a little concerned prepping my items thinking I should probably eat something before hand because I couldn't imagine a decent meal coming out of the things I was cutting up!

But the meal did not disappoint.
 photo Life with Fingerprints-3648.jpg
 photo Life with Fingerprints-3652.jpg
 photo Life with Fingerprints-3651.jpg
The spring rolls were delicious - angel noodles, red peppers, mango, carrots, mint, topped with a peanut sauce wrapped in rice paper. Never would I have thrown those foods together, but it worked well.

 photo Life with Fingerprints-3655.jpg
 photo Life with Fingerprints-3657.jpg
The main course was enjoyable - very Melting Pot-ish. A wide variety of veggies, chicken, noodles and tofu cook at the table in a teriyaki sauce. You then spoon out the items you wish to eat and serve it over rice. I was a fan of everything but the tofu. Just not my thing!

I'm pretty sure I was stuffed after multiple spring rolls - but I made room for the sukiyaki and I'm glad I did. It was tasty - I love teriyaki sauce! I was happy to see there were leftovers which I enjoyed for a few days later.

Our first dinner group left the expectations a little high for the future. I'm not sure what we'll be cooking next - but even if the dinner falls short, the company will still be great!

Wednesday, April 8, 2015

Birthday Cake Rice Krispies...

These are an oldie but a goodie in our house. Bennett's birthday is still three weeks away but the way he's talking about it, you'd think it was tomorrow!

Like all rice krispies, these were easy to make and virtually impossible to screw up!
6 cups Rice Krispies
1 bag of miniature marshallows
3 tbsp butter
1/2 cup yellow cake mix (the original called for less, but I liked a little more flavor)
sprinkles

Melt marshmallows with butter. Once it's almost melted add the dry cake mix. Mix with the cereal. Once marshmallows are stirred in well add a lot of sprinkles. Don't stir a whole lot once the sprinkles have been poured in because it dye will start to color your treats. Press into greased 13x9 cake pan. Add more sprinkles to the top and lightly press down so they stick. Let them sit for 30 minutes before cutting into them. (I like mine a little more gooey, so I add some more marshmallows!)

We made a pan when some cousins were over and loved them so much we made them again the next afternoon. Since you only use a 1/2 cup of the cake mix, you would hate to have any of it go to waste...so you must make these treats a couple days in a row. If you have very little self control, you can also put the extra mix in the freezer and save for another day!

Can you imagine other holidays...Fourth of July, Valentines, Christmas, Halloween...there are endless possibilites here!

Tuesday, February 3, 2015

Bean dip recipe...

Our favorite Mexican restaurant closed down last fall and we've been going through serious bean dip withdrawals. I've been on the hunt for a good comparison and I found an equal match...18 minutes away. That is way too far to get a bean fix in case you were wondering. I've tried a lot of recipes to find "the one". We've altered recipes and altered them again. I've thrown whole batches away because they didn't work for us. But we found one. We eat it with chips, we eat it in burritos. The kids like it. Wins all the way around.
Life with Fingerprints: Easy homemade bean dip made from scratch
1 lb dry pinto beans
2 quarts (8 cups) water
1 small onion
4 Tbsp butter
1 tsp salt, or to taste
1 1/2 tsp chili powder
2 tsps jalapeño (we use canned so the heat is consistent)
2 tbsp green chiles
2 tsps onion powder
1 tsp garlic powder
1/2 tsp ground cumin
1/4 tsp freshly ground black pepper
1/2 brick of cream cheese

Soak beans in a bowl or pot overnight in 8 cups of cold water.
Life with Fingerprints: Easy homemade bean dip made from scratch
Drain and rinse beans after soaking. Place beans in a pot with 8 cups of water and diced onion (or dried onion). Cover with a lid and cook on high for 1 1/2 - 2 hours.

Once cooked (they should be fully tender when pierced with a fork), ladle out 1 3/4 cups of the water and reserve. Drain remaining water by pouring beans into a colander. Place beans, reserved 3/4 cups of water, butter, cream cheese, chili powder, onion powder, garlic powder, cumin and pepper in a blender.
Life with Fingerprints: Easy homemade bean dip made from scratch
Cover blender with lid and blend on low/medium speed for about 1 minute or until well blended. If it is too thick after blending, add more of your reserved water until its the right consistency.
Life with Fingerprints: Easy homemade bean dip made from scratchg
Pour mixture into a large bowl, stir in shredded cheese. Serve warm with tortilla chips. Store in the fridge.

Thursday, November 6, 2014

Oreo Chex Mix...

A while back, I found oreos on sale - the cheapest I'd seen them and I stocked up. I bought 18 in one stop and the next time I was at the store I felt the urge to buy 4 more. The shelf was overflowing and everyone who saw our pantry laughed at the insane amount. However, we're just three months in and the stash is dwindling to just a few bags. I'm kicking myself for not buying more.

The kids take oreos in their lunch. Steve likes oreos and milk. We've had frozen oreo delight. Oreo milkshakes. And...oreo chex mix. Chex mix is a staple at our house and we've played around with many varieties, but this one has stuck. And we seem to have plenty of oreos on hand!

Life with Fingerprints: Oreo Chex Mix
OREO CHEX MIX - or Oreo Muddy Buddies
5 C. rice chex cereal
1 C. white chocolate melts (or chocolate chips)
8 Oreos finely crushed
½ C. powdered sugar

5 C. rice chex cereal
1 C. milk chocolate melts (or chocolate chips)
8 Oreos finely crushed
½ C. powdered sugar
Extra chopped Oreos

You'll see that the recipe is divided into two sections. You make have using white chocolate and half using chocolate and then mix them together in a bowl.

Directions
Melt white chocolate in a microwave bowl and stir until smooth, make sure not to overcook. Cook in short intervals and stir. Pour over chex cereal and stir. Put it in a bag or bowl with a lid, add powdered sugar and finely crushed oreos and shake.

Repeat with chocolate.

Once cooled, mix the white chocolate and chocolate chex into the same bowl and add some extra chopped oreos.

Thursday, February 6, 2014

Hard Rock Cafe Baked Potato Soup...

Perhaps it's the Idaho girl in me but I love a potato just about any way you cook it. I even like potatoes in flake form which my husband lovingly refers to as fake potatoes. So throwing potatoes in a soup (another favorite of mine) is destined to be amazing. I know our cool Arizona temperatures this week pale in comparison to the majority of the country, but it dropped into the low 60's which means its a soup week for us!

This recipe is from a friend and the first time I ate it, it was love at first bite. It's creamy, it has bacon and just enough kick to keep it interesting.

Life With Fingerprints: Hard Rock Cafe Baked Potato Soup
6 · to 8 slices bacon, fried crisp, drippings reserved
1 cup · onions -- diced
2/3 cup · flour
6 cup · hot chicken stock
4 cup · baked potatoes -- peeled and cubed (I throw them in the microwave when I'm running low on time)
1 cup · heavy cream (I've also made this with an additional cup of milk instead of cream and it turned out great!)
1 cup milk
1/4 cup · parsley -- chopped or 3 tsp dried
1 1/2 teaspoon · granulated garlic
1 1/2 teaspoon · dried basil
1 1/2 teaspoon · salt
1 1/2 teaspoon · hot sauce (I add less than this amount and then add more to taste because every hot sauce is different)
1 teaspoon · coarsely ground pepper
1 cup · Cheddar cheese
1/4 cup · green onions, white part only -- diced

Chop cooked bacon and reserve drippings.Cook onions in drippings over medium-high heat until transparent, about 3 minutes. Add flour, stirring to prevent lumps. Cook 2-3 minutes until mixture is golden. Add chicken stock gradually, whisking to prevent lumps, until liquid thickens. Reduce heat to simmer and add potatoes, cream, chopped bacon, parsley, garlic, basil, salt, pepper sauce and black pepper. Simmer for 10 minutes; do not allow to boil. Add grated cheese and green onions. Heat until cheese melts smoothly. Garnish each serving as desired with chopped bacon, grated cheese and chopped parsley. Makes 2 quarts, about 8 servings.

Thursday, October 3, 2013

Manly Caramel Corn...

How many guys does it take to make caramel corn?? You need someone to pour the caramel, someone to stir the popcorn and there's always a need for a supervisor, right? Life with Fingerprints: Manly Caramel Corn 
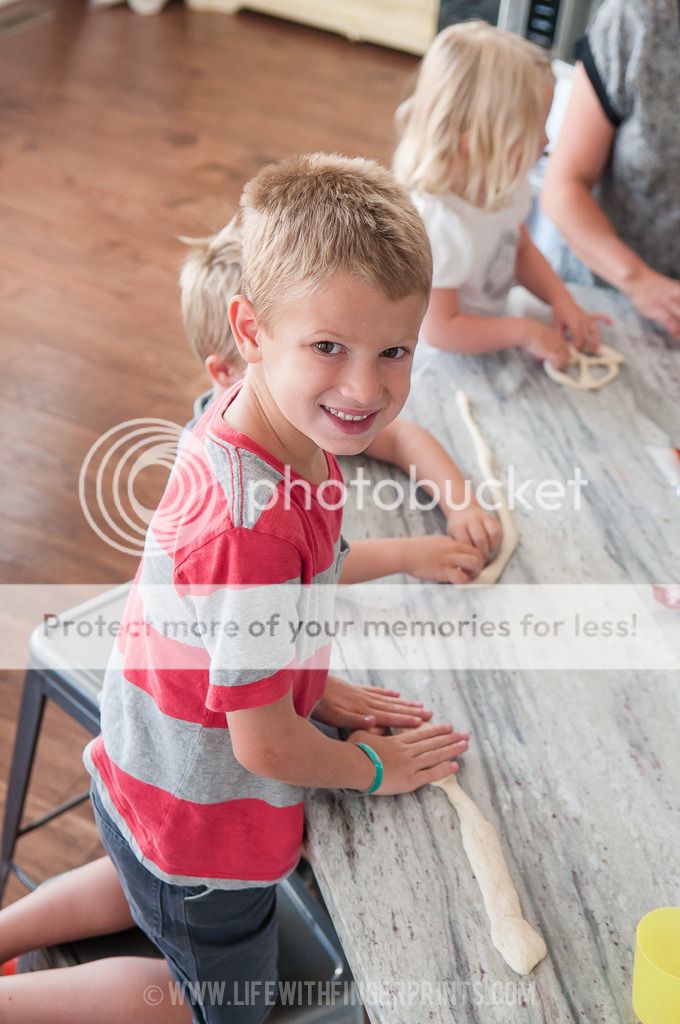
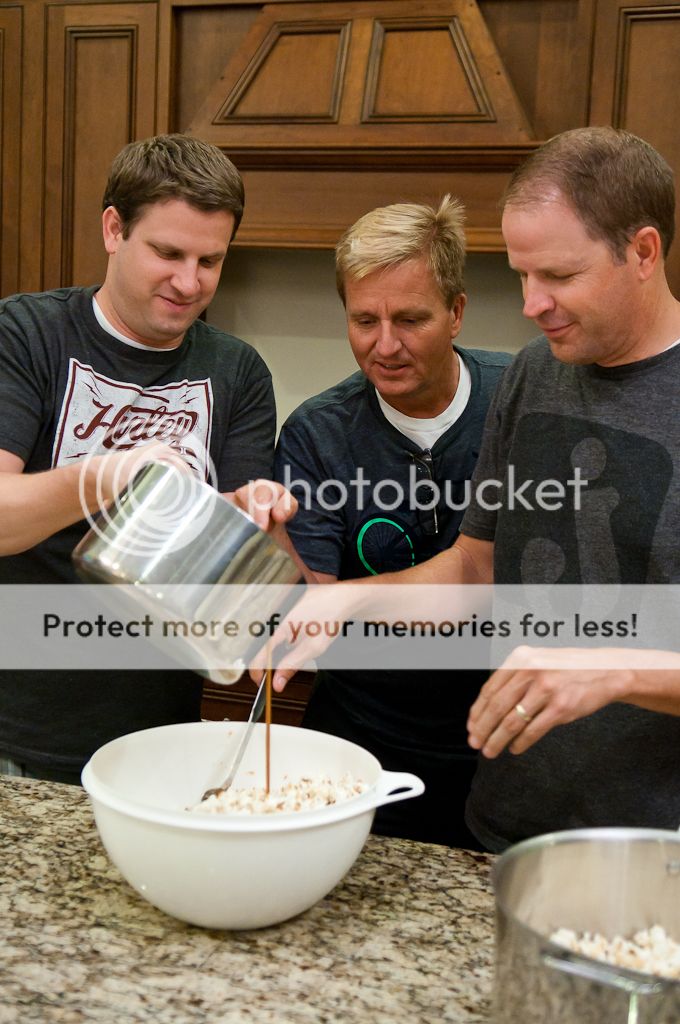
Steve's brother makes a delicious caramel corn and we were there to witness the magic one evening. As you can see, these guys were having far too much fun in the kitchen. Life with Fingerprints: Manly Caramel Corn It's easy to make and it's a crowd pleaser - we took it to a family gathering last weekend and it was gone in no time. Life with Fingerprints: Manly Caramel Corn
Manly Caramel Corn
1 cup butter (2 sticks)
1 lb brown sugar (about 2 1/4 cups packed)
1 cup Karo Syrup
1 can sweetened condensed milk
1 tsp vanilla
2 cups unpopped popcorn

Pop the popcorn and set aside. Melt the butter, brown sugar, and corn syrup over medium heat. After mixture comes to a low boil, add the sweetened condensed milk. Stir constantly for 3-5 minutes scraping the sides and especially the bottom of the pan to prevent any burning. Stir until mixture reaches a soft ball stage (At this temperature, sugar syrup dropped into cold water will form a soft, flexible ball. If you remove the ball from water, it will flatten like a pancake after a few moments in your hand. You can also use a candy thermometer if you have one). The longer you cook it the firmer the caramel will be. Once it reaches soft ball stage, remove from heat and add vanilla. Pour over popcorn in a large bowl and stir until evenly coated. This is a sticky corn and will remain soft. Life with Fingerprints: Manly Caramel Corn We wrapped a few balls in saran wrap for Hallie to use in lunches and several days later they were still soft. It's the perfect fall treat.

Tuesday, June 11, 2013

Broiled corn...

One of my favorite summer foods is corn on the cob. I've boiled, grilled, steamed and frozen corn on the cob. Although my mom would argue that it's a starch, I claim it to be my favorite vegetable. However, corn is not readily available most of the year and even when it is available, it takes some work.

I was at Paradise Bakery a while back eating my favorite: BBQ chopped chicken salad which comes topped with grilled corn. I commented to my friend that I would put grilled corn on every salad if I had it on hand. That is when I was introduced to a very simple yet genius concept: broiled corn.

Don't get me wrong- nothing truly compares to freshly grilled corn, but this is a great alternative.

Take a bag of frozen corn, toss it with melted butter (you can also use oil, but the butter flavor is more like my grilled corn) and throw in some salt and pepper. Spread it out on a cookie sheet and broil in the oven for a few minutes. If you broil too long the kernals start to shrivel, so watch them.

That's it. Grilled-like corn in no time to throw on top of a salad or even as a vegetable (or starch) to go with dinner. Life with Fingerprints: Broiled Corn 
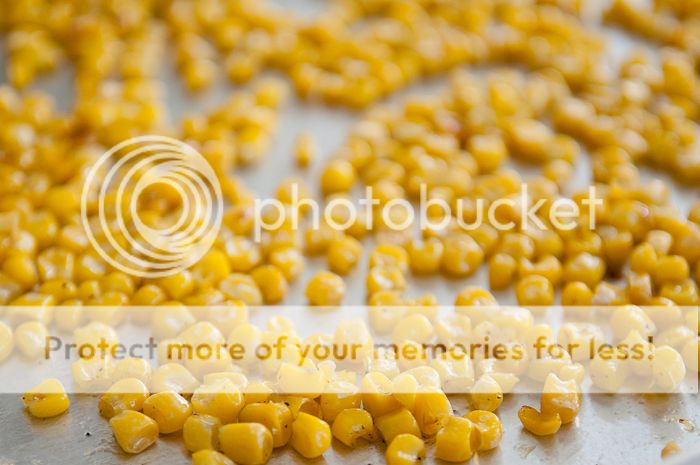
I'm still going to grill my corn this summer, but the advantage of broilng - the kernals don't get stuck in your front teeth while eating them off the cob (causing conversation embarrassment) and the juices don't shoot across the table hitting your dinner guest!

Monday, March 11, 2013

Fresh Squeezed Orange Julius...

Our 12 orange trees in the grove that we call a backyard are in their prime. We've had fresh squeezed juice constantly in our fridge for weeks and we have several weeks to go. I've been trying to come up with new recipes involving oranges just to use some more up, but I'm coming up a little short. Oranges aren't as universal as I was thinking they might be, so we're stuck with orange juice, and...orange juice. Really creative, I know! If anyone has any great orange based recipes please let me know, we're open for all ideas!!

A while back I thought to make some orange julius. It was always a mall favorite of mine stemming from my grandmother who would like to get them as a treat. Fresh Squeezed orange julius 
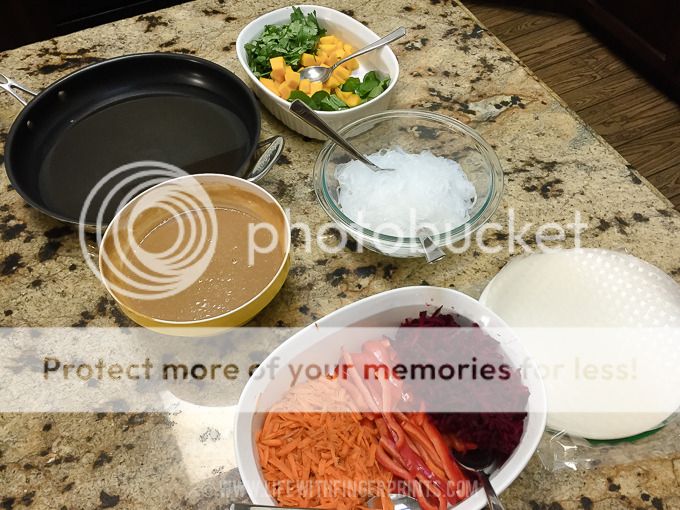
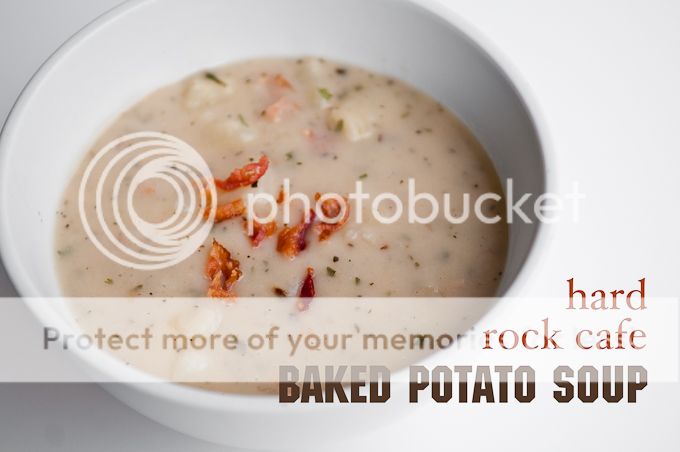
I scoured the internet and found several recipes, we've been trying them out and have compiled a couple to come up with our favorite.

16 oz fresh squeezed orange juice
Ice
1 tsp vanilla
2 tsp vanilla pudding powder
1/4 sugar (depending on the sweetness of your oranges, we've added more or less)

Pour the orange juice into the blender. Add enough ice so the juice rises to the 32oz mark, add sugar, vanilla and pudding and blend. Blend for a couple minutes and serve immediately.

We've been making these two times a day and wouldn't mind throwing in a third round for breakfast! I don't think the kids would complain! 20130311-DSC_8580 photo 20130311-DSC_8580.jpg 20130311-DSC_8581 photo 20130311-DSC_8581.jpg
Related Posts Plugin for WordPress, Blogger...