Showing posts with label Home Improvement. Show all posts

Thursday, August 4, 2016

Insulation is really important...

When we first moved into this house, we had an energy audit performed. We were told they would tell us the inefficiencies in the home which would allow us to fix them and save on our energy bills. It was kind of a sham and really the people came in and told us we needed to buy new air conditioning units because they were old (Information we already had) and conveniently they also installed the units. It wasn't overly helpful.

After moving in, summer rolled around and we noticed our daughter's room was almost 10 degrees warmer than other areas of the house. We did the best we could to remedy the problem with the information we had. Three years later, it was still the hottest room in the house and we called an insulation company to come in an assess the situation. They concluded we didn't have nearly enough insulation in the attic, so they made the needed change. We waited almost two months to see if we noticed a change - no luck. We had them back out to reassess. One wall in particular, an exterior wall, showed a very high thermal reading. They agreed to blow in new insulation if we ripped out the drywall and removed the old insulation.

Late one night last week, Steve and I got busy cutting a strip of drywall out across the entire length of the room. You can imagine our surprise and frustration when we realized there wasn't insulation in the wall. An east facing exterior wall in Arizona without insulation. What?! I'm not sure how that was not noticed by the builder, the inspector or even the ENERGY AUDIT!
Blown-in Insulation
Blown-in Insulation
Blown-in Insulation
Needless to say, we've taken care of the problem. We've had the insulation blown in. The drywall is now reinstalled, taped, mudded and textured. All that's left is some primer and paint. But if I have to buy new paint - shouldn't I just paint the whole room?! And if that's the case, wouldn't it be best to refresh the color?! Decisions, decisions!

Thursday, June 2, 2016

Sizzling weekend...

We've had a relatively mild spring - not too warm - and it's been lovely. We've been able to get a lot done outside before it got too hot.

That's about to change because summer is coming with vengeance. This weekend it's supposed to hit 115. That's pretty toasty even for seasoned Arizonians. With heat like that the kids are dying to be in the pool and I'm singing praises that we finished the yard. No yard work for us this weekend. Thank heavens.

As a sidenote: Our yard has been the talk of the neighborhood for almost 6 months. And now that its done we've received many accolades for sticking with the never ending project. As Hallie's bus drove by one of the last times for the school year, the driver yelled out the window, "Love the yard." Our observant UPS man also commented on how nice it came together. He also remembered that we removed the step up to our house - the step he didn't notice one time and tripped sending our packages flying - he's glad we did away with it. And some stranger who clearly has seen us out there working honked repeatedly as he drove by giving us thumbs up. So glad that project is behind us.
 photo 20160601-DSC_0606.jpg

Tuesday, May 17, 2016

Easy DIY Shiplap Wall...

I'm not sure how I missed posting this sooner - considering it's been done for over a year now!

Easy DIY Shiplap Wall
I know I'm not alone in my love for shiplap - thank you Joanna Gaines! And yet it always seemed like a lot of work. Not only that, but I questioned just how long I would love shiplap. And when I get tired of it, I will have to rip it down and repair the wall behind it. Yet, I had a wall in Hunter's room that was screaming, "Cover me in wood!" And I obliged.

I found a pinterest image of a wall in a nursery room that I fell in love with. I loved the variation of the color in wood, I liked the relclaimed look. I found a company locally that sold reclaimed wood and I priced it out - over $2000 to cover one wall. That wasn't in the budget. I went back to my inspiration picture and traced it to a design group website - who just so happen to sell a tutorial to the wall. Part of me knew it couldn't be that difficult and I could definitely figure it out on my own. But part of me wanted to follow a step by step instruction and get it done. I spent the $15 and bought the tutorial. I'm glad I did.

The tutorial walked me through step by step as to what to do. I did deviate from the plans just a bit. It called for pine boards in different widths. I knew finding nice, straight boards would be hard. I bought plywood and had Home Depot rip it down to the different widths that I needed. The most helpful part of the tutorial was being told what custom stains to purchase and the process of creating different colors. Paint white on these boards, stain these boards wipe off after 3 minutes, stain these boards, wipe off after 7 minutes...you get the idea. It gave me the color variation I loved in the reclaimed wood.

Here's how the room started out.
Easy DIY Shiplap Wall

I prepped and stained the boards per the tutorial.
Easy DIY Shiplap Wall
I located the studs on the wall and used a brad nailer to nail the wood directly to the wall. I started at the bottom (I chose a plywood depth that worked with my baseboards) and worked my way up putting a penny in-between for spacing.
Easy DIY Shiplap Wall
It was a weekend warrior project while Steve was out of town and he was pleasantly surprised to find it finished upon his return. It's very masculine - perfect for my boy's room and definitely a look that will grow with him.

Thursday, April 7, 2016

Front yard progress...

The front lawn has become the longest and most drawn out of any project I've worked on - it's also the most labor intensive. Almost every Saturday, we find ourselves outside working in the yard...for the entire day. And much of the time it's been back-breaking labor. Digging a hole in our clay/rock soil to plant a bush is a long and tiring process. And we've planted a lot of plants so far.

Steve and I had a date (with Briggs and Hunter in tow) at the nursery to pick out our plants. Steve wanted an easily maintained hedge to line the walkway and patio - but a hedge is made of many plants...that's why we've been digging holes (which ended up being a trench) for days. Not only did we have to dig holes, but we had to run individual water lines to every single plant. Steve's shoulders were burning from the digging and my thumbs and fingers were cramping from running all the water lines.

Another Saturday was dedicated to running low-voltage wire and hooking up LED landscape lighting.

Another Saturday was spent breaking up concrete from a previous garden bed that just so happened to be exactly where we needed to plant.

Another Saturday was spent picking out the rocks from our lawn area. I'm pretty sure the kids are tired of hearing us say every week, "Go get your shoes on, you need to go pick up rocks."

 photo 20160318-IMG_4564.jpg
 photo 20160318-IMG_4563.jpg
 photo 20160319-DSC_6153.jpg
 photo 20160319-DSC_6156.jpg
 photo 20160407-DSC_6679.jpg
 photo 20160407-DSC_6680.jpg

I keep trying to convince Steve that we're nearing the end - but then he lists off all the things we have left and we're both discouraged once again. I'm not sure if I'm more excited to finish this project to get our Saturdays back or to be done tracking crazy amounts of dirt throughout our entire home.

We're crossing our fingers that we'll be ready for sod in three weeks - I think all of our neighbors are crossing their fingers too!

Tuesday, March 29, 2016

Easy hat rack...

I found these cool animal head hooks at Home goods over a year ago. I wasn't sure how I would use them but I picked them and put them in Hunter's closet until I figured out a permanent place for them.

They found their permanent place on Hunter's wall just before Briggs was born.

They were different finishes when I purchased them, so I used a glossy Rustoleum spray paint and gave them a couple of coats of paint.
Easy Hat Rack
Easy Hat Rack
I had a scrap pine board in the garage that got a fresh coat of white paint and I mounted the hooks to the board. Hunter was excited to come home from school and find he finally had a place to hang his hats.
Easy Hat Rack
Easy Hat Rack

Wednesday, February 17, 2016

Brick landscaping borders...

When we drew up our landscaping plans we had these pretty brick borders lining our planting areas; keeping everything very linear and clean. When we started our paver work I asked how much it would be to do the brick landscaping borders - I almost choked when I heard $6-7 a lineal foot, plus materials. I'm pretty decent at math and I knew the dimensions of our yard and after dollars signs started exploding in my head, my next question was, "How difficult would this be as a DIY project?" The guy we were working with on the pavers is a neighbor and had been more than helpful throughout the process (he's the one that showed up on a Saturday morning unannounced to help us knock down our trees with his bobcat). He was encouraging saying we could handle it - he said it's labor and precision and takes some time. With that, I knew the project just fell into our laps.

I figured while my dad was in town, this would be a good project to tackle. Neither of us had done anything of the sort (which could be the asterisk to all of our projects!) but we did some research and didn't look back. The first day was a Saturday so we had Steve's help as well.
Concrete Set Brick Landscaping Borders
We decided to concrete set the bricks for a permanent edging. We set our string line and the boys dug the trenches and mixed the concrete. I handled the trowel and laid the bricks, making sure they were level and in line. All my work was done from the sitting position which saved my back but my tailbone was more than a little sore. We got halfway done in one days work.
Concrete Set Brick Landscaping Borders
By Sunday the real soreness had set in and I pretty much made up my mind that I would not be returning to that project Monday morning. It would have to wait until after the baby came because I couldn't mentally get behind it another day. And sure enough late Sunday evening rolled around and my dad was willing and ready to work the next day and I knew we could get it done and not have to worry about it later. So I mustered every ounce of mental strength and started again Monday.

It's funny how mental blocks go - starting is the battle. Once I've committed and started, I'm good. And that's exactly how this project went. I was not looking forward to it and it wasn't nearly as bad or as long as I thought it would be. And as we cleaned up late afternoon I was giddy with excitement. It was done. It was done and I was totally happy with how it turned out. I had to send Steve (who was out of town) a picture of our labors.
Concrete Set Brick Landscaping Borders
And remind him that he has the coolest wife ever.

And the most willing and generous father-in-law.

Wednesday, February 3, 2016

Project Week...

My dad is in town for what has become his annual spring visit - lending his helping hand in moving our projects forward (because that's what makes sense when you're as pregnant as I am!). Today's project: wrapping the patio posts. We have traditional turned posts that once complimented the victorian style of the house.
 photo 20160202-DSC_4873.jpg
But, part of the landscape renovation was updating the look of the house just a bit. Years ago we removed the gingerbread and white picket railing. Now, we're covering the posts; much more economical than replacing them all together. As with most of projects - there was a strong learning curve on this process. Fortunately, we have seven posts, so we're becoming more efficient with each one. We got over half of them done today and we'll be back at it tomorrow.
 photo 20160203-DSC_4883.jpg
 photo 20160203-DSC_4882.jpg
Once they're wrapped we'll move on to trimming them out. And once that's done...my mind swirls with what project to tackle next!

Thursday, January 28, 2016

Front yard progress...

Slowly but surely we're inching away on the front yard makeover.

With all of our removal of trees, bushes and everything else we seemed to get rid of - we had to bring in dirt. Not to mention we had a whole side yard that has always sat 9" below our patio which we wanted to raise considerably. I did my calculations and figured we needed 17 yards of dirt.
 photo 20160118-DSC_4527.jpg
I greatly underestimated just how much that dirt would compact with a tractor grading it and we ended up having another 13 yards delivered which was just the right amount.

With the dirt delivered and with it properly graded - Steve and I got to take a little break. A much needed break.

We hired out the sprinklers (that way we have someone to blame besides ourselves when we end up with dry spots!) and they've been working on them this week.
 photo 20160127-DSC_4572.jpg
 photo 20160127-DSC_4588.jpg
Marking utilities, planning, trenching, new valve box, etc. And while we were at we decided to go ahead and replace the main waterline coming into the house and make it sit more than a couple inches deep - we're lucky we've never damaged it with how shallow it was!

I'm really grateful at this point that we opted to hire this task out!

Unfortunately, the minute they're done, the responsibility turns back over to us and our Saturdays are filled once again. We'll enjoy one more weekend yard work free.

Sunday, January 17, 2016

Weekend warrior...

You know when you get knee deep in a project and you start to second guess whether you should have ever started?! Steve's there on the front yard makeover. We have spent the last several Saturdays and more time before Christmas working outside...for hours and hours. It's a family experience and we're all out there together and at the end of each working day we're exhausted.

Steve was extra exhausted this weekend. We rented a powerful rototiller and Steve tilled the earth (a painful process when your soil is mostly clay) - but it looks and feels so much better!
 photo 20160116-IMG_4401_1.jpg
We need to regrade our property after all of our demolition and this was one step in the process. Steve had to manage this 560lb piece of equipment (that we rented) for three hours straight. He has blisters to prove just how rough this was. I give Steve a lot of credit; we hesitated whether we even needed this step, but he owned it and tackled the whole front yard without any complaints. I didn't do a whole lot more than help the kids remove rocks from the soil we turned up and even that was tiring.

Looking on the bright side - we're doing this in January and not July. It could be much worse. We have to keep telling each other - eventually, this will be worth it!

Sunday, January 10, 2016

Front yard progress....

The front yard is becoming one of those projects where every Saturday we go out and work - yet at the end of a long laborious day it's hard to see much improvement. That's been our last couple weekends. I'm happy to report the patio is finally done with a new paver walkway and we're ready to move on to all the other things on the landscape re-haul list! This weekend's progress was the removal of a light post and mailbox - as well as removing more rock. I did not realize how much rock we had until we started relocating it!

We were hoping to have dirt delivered this last week to start the leveling process but it rained every single day, which is highly unusual for our area and season. Our front yard looked like a swimming pool most the week which meant we needed to let things dry out before moving forward. Instead of leveling, we removed rock. Moving it from our old planter beds to an area that needs to be raised (where we won't be planting anything). It's tiring to say the least and Steve killed it for several hours.

Luckily, removing rock is a task that even the youngest of our children can help with and they've all been out there every Saturday earning their wages in Gatorade.
 photo 20160102-IMG_4387.jpg

Here's how it sits now.
 photo 20160109-DSC_4325.jpg
We've got plenty still left on the to-do list:
Have dirt delivered
Regrade the yard
Run all new sprinkler lines
Run low voltage wires for pathway lights
Lay edging around new planter areas
Build new mailbox tower
Wrap posts to make them less decorative
Install gate
Install new patio lights
Plant new plants/trees
Plant new grass

We've got our work cut out for us!

Wednesday, December 9, 2015

Yard demolition...again...

After our exhaustion from Saturday's demolition extravaganza started to wear off we were able to walk through the next steps we needed to take in this landscape overhaul. We were set to have our pavers delivered this week and we were ready to move forward. And then Steve says, "I think I want the other three trees removed before the pavers go down so we make sure not to damage them." We had planned to remove the trees in January but Steve made a good point, I just didn't think there was a way to get it done without postponing the delivery of the pavers.

On Tuesday morning, Steve talked to our neighbor who knocked down the other two trees and asked if he could get three more out. The guy was skeptical about our timing and told us it would tough to get them knocked down and hauled away before the area had to be cleared on Thursday.

But sure enough that neighbor showed up that evening and at dusk knocked three more trees down and then laughed as he drove away and said, "You've got your work cut out for you tomorrow to get this lot cleared." We knew he was right!

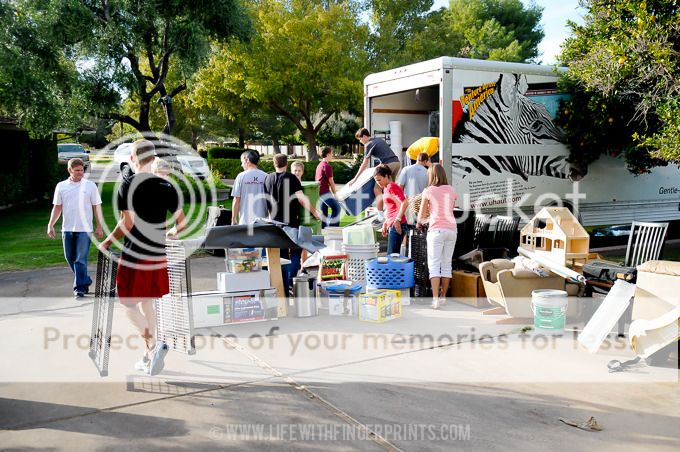
We looked into having someone dispose of them for us and we were quoted some astronomical numbers - so we set out to do it. We borrowed a dump truck from a friend, rented a chainsaw and somehow roped Steve's brother into helping us.

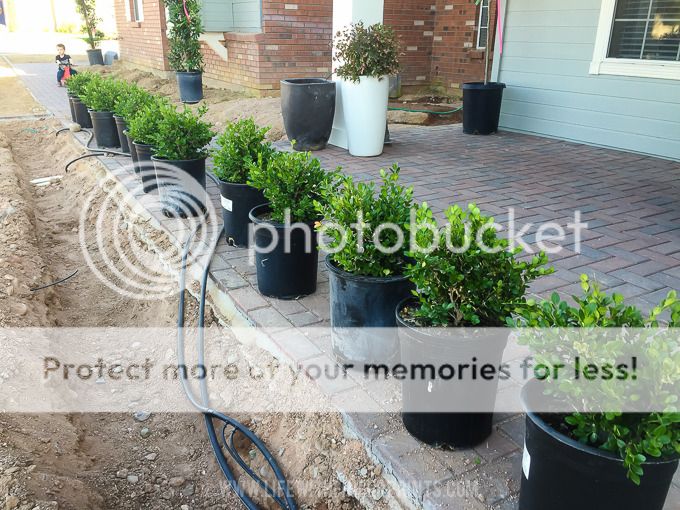
Here was the view our neighbors got this morning as they headed off to work (and this is only two of the three):
 photo 20151209-DSC_3677.jpg

 photo 20151209-DSC_3671.jpg
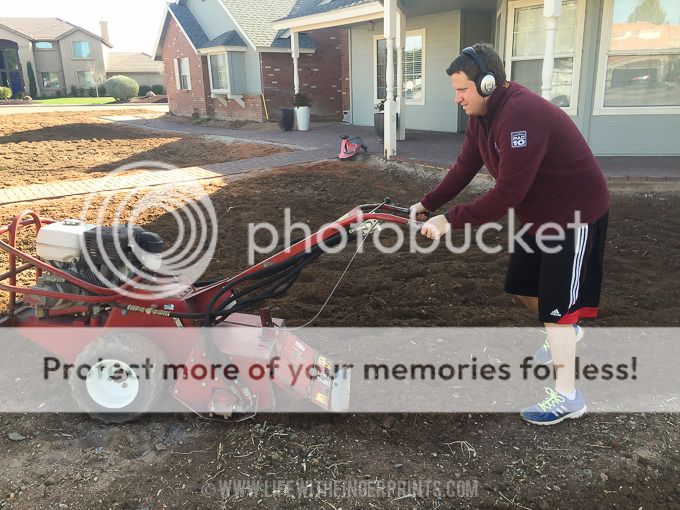
We wasted no time getting after it and we worked out a decent system. Steve's brother manned the chainsaw the majority of the time - I took the smaller cut up branches and handed them off to Steve who was in the dump truck continually stomping down the branches making room for as much as possible. (Steve was very conscious the entire day to monitor what I could and could not be doing in my condition!)
 photo 20151209-DSC_3679.jpg
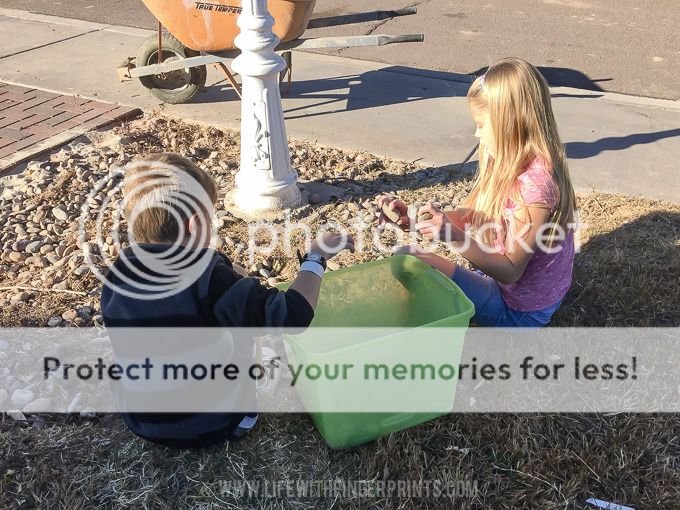
Shortly after lunch we finished up with the trees and we were left to the clean-up stage. The larger pieces of wood were put into a pile and the neighbors gathered what they wanted for firewood and the roots were dumped into the truck using the bobcat. By the time the kids came home from school we were ready for their help in collecting hundreds of oranges that had scattered across our now dirt yard.
 photo 20151209-IMG_4304.jpg
By dusk we were dirty and exhausted and we had three trees removed from our property. I think we surprised most the neighborhood (including our friend who knocked down the trees) by getting it all done by the time they made their commute home from work.

Having those trees down completely opens up our house. In fact, it feels a little naked now! It was hidden behind those trees for so long, most forgot what it looked like. But we're in the business of home improvements and this house is proving to be a never ending project! (which I not-so-secretly love!)

Monday, December 7, 2015

Front yard demolition...

I'm not entirely sure how it happened but somehow our legitimate need to have the sprinkler system reworked has become so much more. And oddly enough - I wasn't the one pushing this project. Our lawn guy...aka my husband...was tired of dealing with a subpar sprinkler system. So naturally we started looking at options to have our system redone so it would water properly.

Which would require us digging up our lawn and trenching new pipe. And then the innocent thought bubbles up...if we're digging up the lawn and running new pipe, are we entirely happy with how our landscape is currently laid out? When that answer was a resounding "no", we started working to create a new landscape plan we would be happy with (which included Steve's request of ripping out 5 of our orange trees, we have too many oranges and he's tired of the maintenance.)

With a plan in place we looked at our current lawn and knew we just needed to start over. We decided to have some pavers installed by a guy in the neighborhood and we were in charge of the demolition and prepping the area. Steve and I figured we could take a couple weeks and start the process. Ripping out brick edging, removing plants and bushes, removing at least two of the trees (we could remove the other three a little later) and removing rock. We figured we'd leave the sidewalk demolition to them.

Bright and early Saturday morning we went outside with the kids and started the process.
 photo 20151205-DSC_3615.jpg

Steve removed the brick edging and the kids picked them up and moved them to the driveway area. We started tackling one of the trees before Steve went to help someone move. Just after Steve left our neighbor (who's helping us with the pavers) showed up with a bobcat and asked if we wanted some help. Of course we used his help.
 photo 20151205-IMG_4278.jpg
And before long our sidewalk was removed, our tree was laying flat in the neighbors yard (uprooting some of their sprinkler system) and nine 10ft bushes had also been pushed into the neighbor's yard. This is about the time that Steve returned home and wondered what in the world I had done while he was away for one short hour!
 photo 20151205-DSC_3639.jpg
 photo 20151205-IMG_4285.jpg
We worked our tails off the rest of the day trying to calm the chaos that had become our yard. Someone in the neighborhood saw the tree down and came to cut a lot of firewood. The rest we cut into manageable sizes and put them in trailers. We made two trips to the dump and delivered 5 tons of stuff and we have two more trailers in front of our house ready to go.
 photo 20151205-DSC_3649.jpg
 photo 20151205-DSC_3652.jpg
We fixed the neighbor's sprinkler system and made sure that was back up and running and then we picked up more oranges than I could count.
 photo 20151205-DSC_3645.jpg
We ended up getting far more done than we ever anticipated but it was a long day full of a lot of hard work - and now our yard looks a little sad and very unwelcoming with our nice uneven dirt path leading to the front door. And my guess is it will look even worse before it gets better!

Wednesday, November 18, 2015

4 year anniversary...

It's hard to believe we're only celebrating our four year anniversary of living in this house. It was just days before Thanksgiving when we first unloaded the truck (of stuff we hadn't seen in 10 months) and the overwhelming part of unpacking started to set in.
 photo 20111118-DSC_2291_1.jpg

I still remember the first time we walked in and Steve didn't get as far as the living room when he made the statement, "There's no way."
Life with Fingerprints-2263 photo LifewithFingerprints-2263.jpg
I suppose the wall to wall mauve carpet (with sections of fake wood set in) was a little hard to look past. As well as the orange oak and 80's brass fixtures around every corner. It was due for some love and attention and I just knew I could give it the love it needed. Although Steve was skeptical and could not see my vision - he had faith that we could make it our home. And we have.
 photo 20140814-DSC_8728.jpg
It's home and it's comfortable and I love it. We've come a long ways in four years which is a little disheartening when I think of all we have left to update and fix. But there's no rush; we slowly chip away at our to-do list as money and time allows. My hope is by our 10 year anniversary of living here we might get it to where we both want it. Baby steps!

If I was handing out trophies to our home, they would be as follows:

Biggest visual improvement: Hardwood floors

Biggest stretch of my abilities: The entertainment Center

Most Prep Work: The staircase

Most admired by visitors: The green barn door

Most dreamed about project: A kitchen update

Most Maintenance: Our 13 orange trees (Which is why Steve is antsy to rip out half of them!)

Hardest place to keep clean and organized: The garage wins by a landslide!

It feels good to be home.
Related Posts Plugin for WordPress, Blogger...