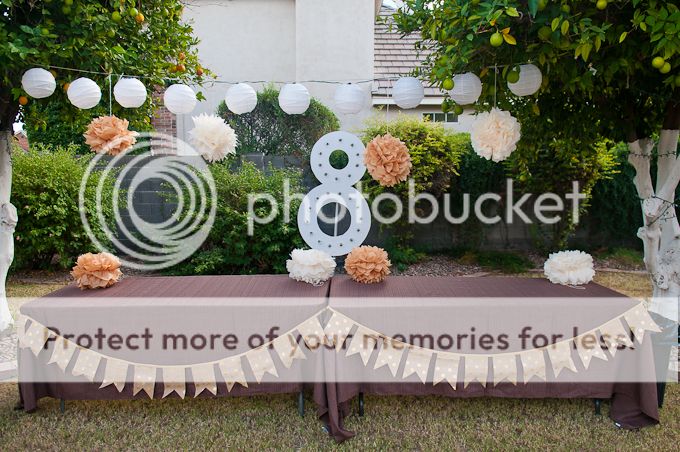
 I was inspired by this project here from the website Tater Tots and Jello. I mentally "pinned" the item a while back and knew that I wanted to make a marquee - I made an 8 in honor of Hallie's baptism (knowing that we'll have several kids turning 8 - call me crazy but I think it would be fun to create all the numbers to use on their birthday every year.)
I never referred back to the inspiration site, so I'm not even sure how they created it but it was really easy.
I bought a hobby piece of plywood from Home Depot and drew a large 8 and cut it out using a jig saw.
 I found round patio lights at target (string of 25 lights) and marked off on my board where I wanted to drill. I tested several bits until I found one that the base of the light would fit through, but once the bulb was screwed in, they would fall through the hole.
 I had my trusty assistant sand the whole thing down and paint it white. (She was beyond excited to take this project on as her own!)

 Once it was painted, I removed all the bulbs from the string. From the back, I inserted the base of the light and screwed the bulb in from the front.
 I attached a conduit fitting to the back so I could mount it on a pole in the ground. And we were done.
Really easy (as long as you can follow a line with a jig saw) and inexpensive and it was the main focus (also lighting the food table) as the night grew dark. The best part was watching Hallie tell people how we made it - she was pretty proud of her work...rightfully so!


was this made before or after cannon came along? . . .and I wouldn't be surprised one bit if you said after! it's fun that hallie is old enough (and willing) to help you with projects - makes for some fun mommy/daughter bonding time! great job
ReplyDeleteIt was created before the the birth! Are you coming for Christmas??
DeleteThanks for sharing all this! I'm so excited to try something like it!
ReplyDeletethat's so cool! please tell me you made it before you had your baby or there is no hope for me lol! I LOVE the burlap bunting with the gold polka dots…did you make that as well? I noticed your table runners were the same. I'd love to know how you did the circles so perfectly!
ReplyDeleteIt was definitely created before I had the baby! The burlap with the polka dots is my new favorite - I actually purchased the whole bolt at Joanns (they also carry it with silver dots, which I'm thinking would be perfect for Christmas!)
DeleteIt's awesome that you're teaching your daughter to be handy with the power tools! I enjoy seeing all your wood working DIY projects.
ReplyDelete