Showing posts with label Home Improvement. Show all posts

Thursday, September 24, 2015

Heritage gallery wall...

Most of my projects require me at some point to sit at the computer and make my plan. I use Illustrator to draw things to scale so I get a good idea of what the end product will look like. This comes in handy when I'm hanging anything on my walls. I'm not sure why, but hanging stuff is paralyzing for me. As if once it is hung it can never be removed. I'll have things stacked against the wall for months before having the courage to hang them. And I only hang them after I've measured the wall and drawn everything out. It's a process.

Even after drawing it out on the computer, I often take one more step: Trace all my elements on paper and cut them out and hang them.

You can see on my "heritage wall" below I have my computer version (white paper) taped to the stairs and then all my cutouts in their place. (as you can see this picture was taken before we made some major updates) I even marked where the hook (to hang the frame) was located on the paper so I could nail straight through the paper and get the right placement each time - without multiple wounds to my wall.
Heritage Wall - creating a gallery wall

This is a process where a little upfront effort goes a long way!
Heritage Wall - creating a gallery wall
It was an awkward space before - on a small wall - and now it houses some of my very favorite pictures of our ancestors. It's our heritage wall and it's always a conversation starter for people visiting our home. It's good to know where you come from.

Wednesday, July 29, 2015

DIY Barn Lights...

Life with Fingerprints: DIY Barn Light using outdoor lights from Lowes
Hunter's room is a work in progress and it's been in progress since...we moved in. Even after painting and decorating it (with stuff from his old bedroom) I just never loved it. But rearranging his room, planking the wall and hanging these lights are making me love his room.

Lighting makes a space and it always seems to be the budget breaker as well. I had my heart set on some beautiful, kelly green barn lights from an online store. They were also ridiculously overpriced at $340 a piece. I was determined to get the look for less.

Here’s how I did it. I found some outdoor lights at Lowes for $40 a piece. The lights were meant to be hard-wired – but I didn’t want permanent wires ran to these lights. So I opted to convert them to plug-in lights after talking with an electrician. Before painting, I drilled a hole in the bottom of the lights using a metal drill bit.

Life with Fingerprints: DIY Barn Light using outdoor lights from Lowes
I could’ve painted the entire light green, but I wanted to preserve some of the aluminum color. I used painters tape to mask off the areas I didn’t want painted and sprayed it with Rustoleum glossy paint.
Life with Fingerprints: DIY Barn Light using outdoor lights from Lowes
With the paint dry – I converted it to a plug-in light. I purchased a wire kit and connected it to the hard-wired wires found in the light.
Life with Fingerprints: DIY Barn Light using outdoor lights from Lowes
I used the bracket that came with the light and modified it slightly so it would hang on my wall and in no time I had two lights hanging above his two beds in the room.
Life with Fingerprints: DIY Barn Light using outdoor lights from Lowes
They were just what I was hoping for and they didn’t break the bank. No need to pay for high-end, create your own cheap custom barn lights!

Wednesday, July 22, 2015

Leak-free...

One week after we bought our house our skylight started leaking. (It's hard to believe those seller home reports when they say there's no known leaking - yet the drywall clearly had severe water damage that the inspection pointed out!)

We've had our fair share of problems with it - many refuse to even put skylights in because how hard it is to keep them sealed.

Earlier this year we had serious leaking and I was panicking as I saw it dripping down through our ceiling drywall. That's when I came up with the brilliant solution of a tarp, sandbags and 2x4s. It was a creative solution only to get us by until someone could really come fix it. And wouldn't you know it I called multiple roofers to come take a look and not one followed through with his promise to come check it out or even call me back.

And then we kind of pushed it out of our minds because we had temporarily stopped the leaking. Multiple rainstorms and we were dry as a bone. It bought us another four months! But monsoon season can be brutal and we don't want to stress or worry about it any longer.

The day after we got back from Idaho we had the skylight replaced (one of the three that we have).

I banned the kids from the living room and watched as things slowly fell from above.
 photo Life with Fingerprints-0222.jpg

 photo Life with Fingerprints-0227_1.jpg
We are promised that we will have at least 10 years of a leak-free skylight. I've got a feeling now that we have a handle on this one, one of the other two will start leaking!

Could Steve have possibly been right when he labeled this house the money pit from the start??!

Tuesday, July 7, 2015

Move that shed...

We had an old shed in the corner of our yard. We never liked the placement of this shed, it didn't function how we needed it to and it needed some serious TLC. I opted to build a new shed with the help of my dad which meant the old shed was rendered useless. Steve was on a yard work kick several weeks back and he was ready to rip down the eyesore we called a shed. We always planned on tearing it down and scrapping it but once it was time to do it, I couldn't do it. I was sure it still had plenty of life left - just not in our yard.

I posted it on craigslist and I had a couple people interested. One guy was ready to hand over some cash he just needed us to move it. I laughed at him because I figured the only way the shed would leave our yard would be dismantled and if I was dismantling it I didn't want to take the time to make sure it could be put back together again!

Another guy showed up with a trailer - thinking he could just pick it up and put it on the trailer that day. I laughed at him to - its a big, heavy shed. But he was determined. He paid me the money and told me he would come back a few days later.

He came back prepared for a battle.
Shed photo 20150622-DSC_9219.jpg
He worked and worked to move this shed.
Shed photo 20150622-DSC_9221.jpg
He had a jack, he set up a roller system with heavy piping to roll it, he jacked it up again, he rolled. It was a process. He had to remove our large fence.
Shed photo 20150622-DSC_9222.jpg
Even after he moved it a significant amount I thought there was no way he would actually get it on the trailer.
Shed photo 20150622-DSC_9224.jpg
He proved me wrong - he was determined and it paid off.

Now I'm looking at the empty corner in our yard and think it's about time we pull out the shovels to start digging a hole for the trampoline!

Thursday, April 9, 2015

More paint...

I'm forging forward with home projects slowly but surely - hoping to get done before our warm weather is here to stay and the kids are home from school for the summer.

I've replaced all the trim upstairs except in Bennett's room and hopefully I'll get to his in the next couple weeks.

I painted Hunter's room a couple weeks back - here's the before:
 photo Home Improvements-6162.jpg
His beds were against the window wall and I thought it would be cool to plank the wall in wood. With my plan in place I set out to paint his room and I thought I was so smart when I realized I didn't need to spend the time painting the soon-to-be planked wall because it would soon be covered. Sure it would look a little goofy for a little bit but it would be worth the time and paint saved.

So it looked like this and I was okay with it. I just kindly explained to the visitors staying in that room my vision!
 photo Home Improvements-3230.jpg

As I started to move the furniture back, I tried the beds on the other wall, and I liked it better. And with the beds on a different wall, that meant I wanted to plank a different wall - the wall that I spent time painting two coats of paint on!

I hate when I waste time on silly mistakes like this. I put off painting it until this week. But its done.

Since paint supplies were out, I went to town on the loft this week (or week and a half) as well.

We removed a cabinet a year ago and as you can see they had painted around it. I laughed every time someone new came to our house and they would point to the wall wondering what interior designer was helping me out. On top of that, I've been testing paint samples for at least two weeks.
 photo Home Improvements-3224.jpg

This room quite possibly took the longest of any room I've painted and it's not that big. It was stretched over a week and a half and it seemed to drag on. But with more company arriving tonight I finished it up and moved everything back in place. And if it weren't for the smell of paint you would never know it was on my to-do list today!

Monday, March 16, 2015

Replacing trim...one door at a time...

This project has been a long time in coming and I'm finally getting around to it: replacing the trim upstairs. We moved the doorway for the bathroom when we remodeled which meant we tore off trim and never replaced it. When we removed the massive oak cabinet last summer before the carpet was replaced, it left a wall with no trim.

On top of that that it has to be the most detailed baseboard I've ever seen which is impossible to clean. It's been painted a couple times over the years and because it's difficult to paint trim up against carpet the mauve carpet stuck to the wet paint and even when we ripped out the carpet, there was a strip of mauve still attached to the baseboards. It's been on my to-do list for a while!. Once the shed was up and my dad was gone, I started ripping out and replacing trim. Its a process, especially when it's sandwiched in-between carpool for tennis, snack time and making dinner.

I'm spraying the moulding outside (using my Graco TruCoat Plus II) 10-12 pieces at a time. My backyard has looked like this for the last three weeks:
Life with Fingerprints: Replacing our trim work

Tearing off and prepping (getting the old caulk off, repairing any damages) took much longer than expected and I think I averaged two doors a day for a week; our loft alone had 8 doors to trim. Each door doesn't take much time, but it's about all the time I could give.
Life with Fingerprints: Replacing our trim work

After the loft was finished I was ready to clear my patio of sawdust and my lawn of drop cloths. But knowing we had company coming this week, I decided to kick it into gear to get two more bedrooms done. Of course, Hunter's trim replacement prompted a quick painting of the whole room which set me back just a bit!

People often ask how I'm able to get projects like this done with life swirling around me. This is how I roll:

I have to make a list of every little task and in this case a timeline to make sure I could get it done in time (before guests arrive). Let me remind you, I allocated about an hour to an hour and a half per day that I assigned myself a task so it didn't disrupt life too much. This could be done during nap time (tasks not requiring the loud air compressor), late afternoon while the kids were outside playing or after the kids went to bed for the night, which is what I prefer but once again the compressor! Here's my task list that I created last week

Pick up paint - Mon am
Tear off Hunter's moulding - Mon pm
Paint Hunter's room - Tues
Spray Moulding - Tues pm
Install Hunter's moulding - Wed & Thurs
Caulk/Putty/Touch up - Fri
Remove Guest room moulding - Sat am
Spray trim for Guest - Sat pm
Install guest trim - Mon & Tues
Caulk/Putty/Touch up - Wed
Guests arrive - Thurs


It's Monday and I'm on time and on-budget...there's a first time for everything!

Tuesday, March 10, 2015

Paint therapy...

I had a pretty crappy morning. I got the kids off to school and as I picked up the house I came across an atrocious smell coming from the bathroom. I'll spare the details - but a certain toddler with loose stool was doing his best to be independent in the bathroom and it all went awfully wrong. It was bad - I think it's the worst I've seen and it was all done in an effort to clean up after himself. After an hour of disinfecting the bathroom I was ready to do something fun.

I was already planning on going to the paint store to pick up paint for our trim and I made the decision to buy another gallon to paint Hunter's room. No test samples, no swatches, I just pulled the trigger. (Luckily I have seen the color in someone else's house) It had been on my distant to-do list since the color was just not working for me. I had pulled off the baseboards to replace them and thought now was as good of time as any, and I needed a little paint therapy. (much more effective for me than retail therapy)

I cleared my afternoon (kids napping) schedule and went to work.

Goodbye English Tan.
Paint Therapy
Paint Therapy
After pics to come soon.

I've got to get this room back in livable condition soon, we've got company coming next week. I'll need to be speedy on my trim work!

Sunday, March 1, 2015

Leaky skylights...

We have three skylights in our house and within 1 month of moving in two of them were leaking.

We had them repaired. They were good for almost a year and sure enough they started leaking. I'm not talking a little water. I'm talking water coming in the skylight, leaking through the roof, running down the trusses and puddling and then coming through our living room ceiling drywall. It's been like this for awhile.

We had it repaired again. That lasted for 8 months and monsoon season rolled around and all the sudden we had water coming through the drywall again. The first thought is to remove them all together but they offer a lot of light. Each roofer we have is convinced they can fix it. So they patch it and then the patch dries and cracks and water comes through again. A couple weeks ago we had a bad storm and it was coming through the ceiling like never before. I called so many roofers to come and help but of course no one could make it out that day. So I watched as water continued to come in. I went into the attic to check it out and there was nothing I could do to stop it.

Then a brilliant idea popped in my head. I could use sand bags and a tarp to cover the skylight to ease the amount of water coming through. But I needed sand bags asap and my kids were napping. Steve was at work and in meetings...I called in reinforcements: My brother-in-law. Not only did he go and pick up sand bags for me, but he then proceeded to spend the next 40 minutes on the roof with me as we did our best to cover the light. He deserves an award because carrying up 50lb bags on a steep slick roof (and it was still raining) was a little scary! I was so grateful. Steve was so grateful. Once we got it covered, not a drop came through the ceiling.
Life with Fingerprings: Temporarily fixing the leaky skylight

Why does this story from a few weeks ago come to mind? Because I just saw the forecast and we're slated for rain tomorrow and it was when I saw the forecast that I was reminded that the roofer that I got a hold of to come check it out never came by. Which means my roof still has sandbags and a tarp and I'm hoping it's enough to get us through yet another storm before someone can come in and switch them out for solar tubes. Time will tell.

Sunday, October 19, 2014

The entertainment center...

Back in February, I took on the project of all projects building a 12ft by 8ft entertainment center with my dad. And after it was built, it sat empty because although I have crazy cool vision for creating a project, I never feel confident in the accessorizing department. Every once in a while I would come across something I liked and months later we have a semi-accessorized unit!

But lets start from the beginning, a couple months after moving in:
Life with Fingerprints: DIY Entertainment Center, building project, media center

A year later we finally got around to replacing the mauve carpet, painted the walls and hung drapes:
Life with Fingerprints: DIY Entertainment Center, building project, media centerLife with Fingerprints: DIY Entertainment Center, building project, media center
At the beginning of this year I flew my dad down and we spent the most exhausting 7 days making this come to life. I still look at it sometimes and I'm amazed that the drawing I made two years ago actually came to be. I learned so much in this process and I'm just sick enough that I would do it again!
Life with Fingerprints: DIY Entertainment Center, building project, media center

Here's our step-by-step process:
DIY Entertainment Center - Day 1
DIY Entertainment Center - Day 2
DIY Entertainment Center - Day 3
DIY Entertainment Center - Day 4
DIY Entertainment Center - Day 5
DIY Entertainment Center - Day 6
DIY Entertainment Center - Day 7

Thursday, September 4, 2014

More guest room updates...

I have place holders throughout my house. Rooms change and colors change which means I have decorations floating around the house. Something might end up in three different areas of the house before it's served it's purpose and ends up in the garage ready for donation. These particular lamps have been placeholders for a while.
Life with Fingerprints: Guest room lamps update, West Elm Factory Wall Sconce
We had them when we moved to Milwaukee many moons ago. They were in our bedroom. Then they were in Hunter's bedroom. And they've been sitting in the guest bedroom since we moved in. I didn't love them in there, but they were placeholders until I found something I liked better.

I've had my eye on these sconces from West Elm for a long while and it wasn't until my sister-in-law was over that she confirmed my decision and they were ordered that night!

My assistant Hallie and I spent this afternoon installing them. Let me tell you, that girl of mine has construction in her blood. She held that lamp steady and level while I drilled the holes, which is harder than it sounds! She also took some pictures - she's good enough she might start requiring payment.

Life with Fingerprints: Guest room lamps update, West Elm Factory Wall Sconce

This reminds me that the nightstands are also placeholders! I even have all the materials for the new ones and haven't gotten around to it for...a year and a half. Embarrassing, I know. But the new lamps may just light a fire in me!
Life with Fingerprints: Guest room lamps update, West Elm Factory Wall Sconce

Friday, August 22, 2014

What a difference...

We have a guest room in our house. The thing about the guest room is, I so rarely walk into that room that I fail to give the room any attention until we have guests coming, and then I try and figure out what I can do to make the room a little more presentable.

Two years ago I painted the guest room, Benjamin Moore Gray Horse. I built a bed for the room and then it sat. And sat.
Life with Fingerprints: West Elm Curtains, Benjamin Moore Gray Horse
We had a lot of guests walk through that door and every time I thought, I really need to add something to that room. So with company arriving this weekend - I was on a mission last week to get something done. My first stop was West Elm. Hallie and I walked directly to the curtains and picked out a pair. I thought for sure I'd get them home and then return them two weeks later because thats typically my luck with home stuff. But wouldn't you know, we got them in the room and I loved them. It was just what the room needed.
Life with Fingerprints: West Elm Curtains, Benjamin Moore Gray Horse
It's amazing what some curtains can do for a room and I'm laughing that it took me that long to do it. I've got some other ideas swirling around for that room as well but company will come and go and I will table my ideas until company shows up in the fall and I'll rush to make something happen!

Monday, August 18, 2014

Gray paint samples...

I've found that some of my more difficult paint choices have involved the color gray. I want gray, yet it reads blue, purple, green...just about anything but gray. I was ready to move forward with another painting project and I thought I knew what color I wanted and I had a half gallon already sitting in the garage. I originally painted the bathroom this color and then changed my mind after the first coat because it was too dark in the small space. So I took Dunn Edwards Gray Pearl and painted a section on the wall. I liked it, didn't love it. So, I came back to the room in the late afternoon and looked at it again. Still didn't love it. Walked in at night when it was dark and it still hadn't grown on me. Gray Pearl was just not working for me.

I went to Home Depot and picked up three samples: Dunn Edwards Cloud, Benjamin Moore Revere Pewter and Benjamin Moore Stonington Gray. I was sure I wanted Cloud but since I was there I picked up two other samples. I've always wanted to test Revere Pewter and Stonington Gray was really a last minute choice.

The minute I opened the can for Revere Pewter I knew it was off - sure enough its not even close to the paint swatch - so I'm still not sure if I like that color!

Here they are all lined up next to each other.
Life with Fingerprints: Determining what gray to paint the bedroom; Dunn Edwards Gray Pearl, Dunn Edwards Cloud, BM Revere Pewter, BM Stonington Gray

I moved forward with Stonington Gray and I love it...more pictures to come...

Thursday, August 14, 2014

Goodbye Mauve Carpet...

We did one of my favorite updates on the house just as school was letting out and it has made a world of difference: We got rid of more mauve carpet.

Lets go down memory lane for just a minute. When we moved in three years ago - it was all mauve carpet (and a few areas of fake wood).
Life with Fingerprints: Goodbye mauve carpet, hello gray carpet
A year and a half ago we ripped out our first batch of carpet and laid hardwood. It felt so good. But it made it that much harder to put up with the mauve carpet we had left. Another year and a half passed and we were ready to replace another chunk of carpet. We had company coming for Steve's parent's anniversary so we figured we would push the project into high gear to get it done before they arrived, so we didn't have to cringe when we saw them walking without shoes on!

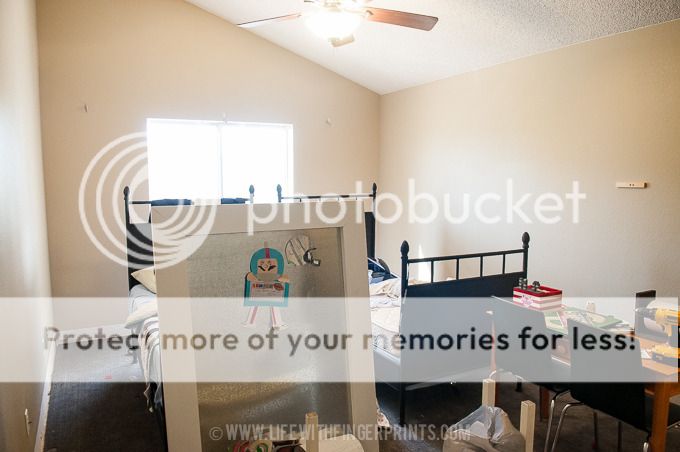
I'm a list person and my projects come with complete lists of tasks that need to be completed. There was a slight snowball effect when it came to removing all the upstairs carpet, as well as the stairs and Bennett's room. It started with the massive cabinet in our loft upstairs. I knew I didn't want the cabinet long term, which meant we needed to remove it so we could carpet underneath it. This was a task and a half.

Life with Fingerprints: Goodbye mauve carpet, hello gray carpet
This cabinet was a single unit and it was heavy. I figured it was still in great condition and it would be great storage in the garage.

We started by emptying all the books and random items that ended up in it over the two years.
Life with Fingerprints: Goodbye mauve carpet, hello gray carpet
I didn't realize just how much stuff was in there - Steve asked halfway through emptying, "Where are you planning on putting all these books?" Great question, didn't think that through completely. I just knew the unit had to go in order to get carpet, so out it went.

We called some strong men over to lend a hand (and a back) and I honestly thought they would just carry it down the stairs. This is where it got a little hairy...I've come to the conclusion that the unit was either assembled upstairs, or the staircase didn't have a railing yet. It was that difficult.
Life with Fingerprints: Goodbye mauve carpet, hello gray carpet
These guys seriously worked at this. They shuffled and slid and moved lights. Changed positions. Took it back to the top of the stairs and reevaluated. Steve at this point was probably cursing me under his breath wondering why in the world could we not just keep the cabinet upstairs until the day we die. I was ready and willing to cut the thing into toothpicks to get it out of the house! But these patient helpers kept coming up with new solutions...and you know what...one of those solutions worked.

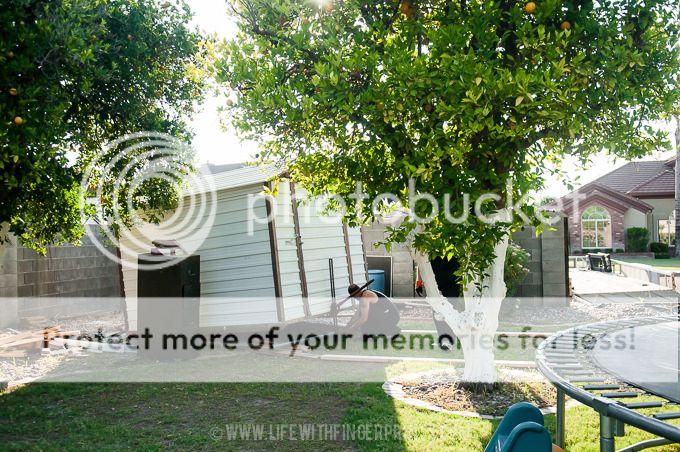
It is now happily situated in the garage full of goodness (i.e. power tools and such).

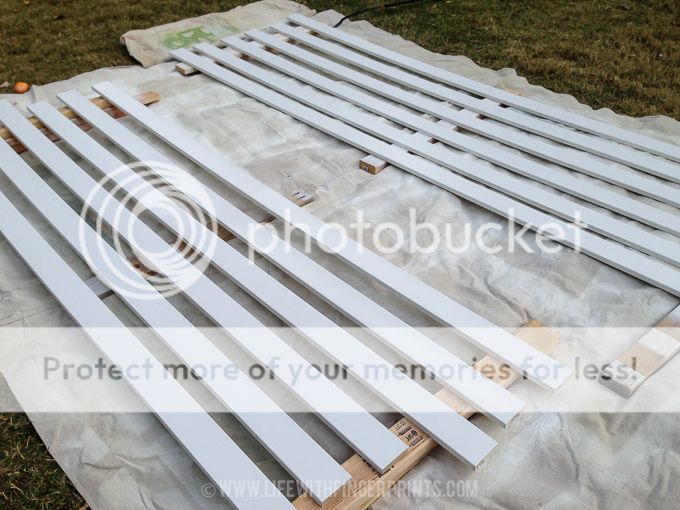
With the cabinet removal checked off my list, I moved on to painting the staircase. And after that was complete, we were ready to carpet.

Tears of joy were shed (only slightly exaggerating) as I saw the workers cut that carpet, roll it and carry it out on their shoulders. Watching the dirt fall out of it as they carried it out was enough to make me throw up in my mouth just a bit!

In all it's gray glory - it's done! (We've only got our bedroom and the playroom left, wahoo!)
Life with Fingerprints: Goodbye mauve carpet, hello gray carpet
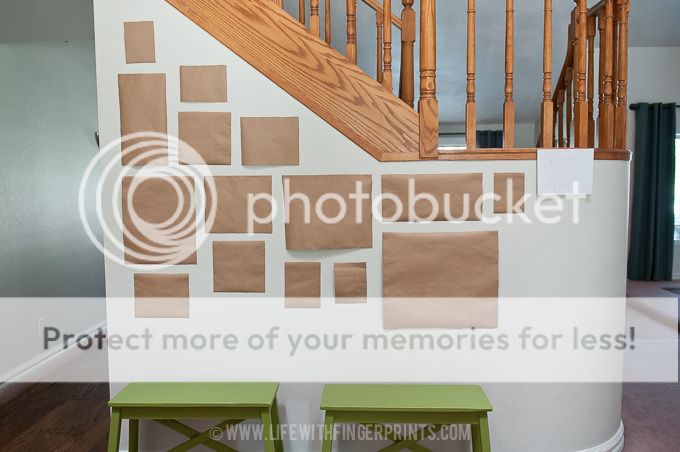
And because a project is never truly complete...I've got some work to do upstairs where the cabinet once stood.
Life with Fingerprints: Goodbye mauve carpet, hello gray carpet
Add it to my task list!
Related Posts Plugin for WordPress, Blogger...